Before getting started in DTS, it is highly recommended that you set your DTS specifications for all plans first. The specifications drive what appears in the data collection screens via the portal, as well as which parties should have access for data entry and initiation via the portal.
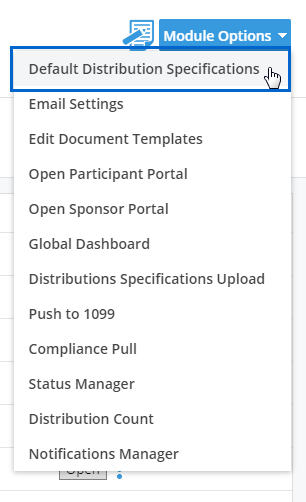
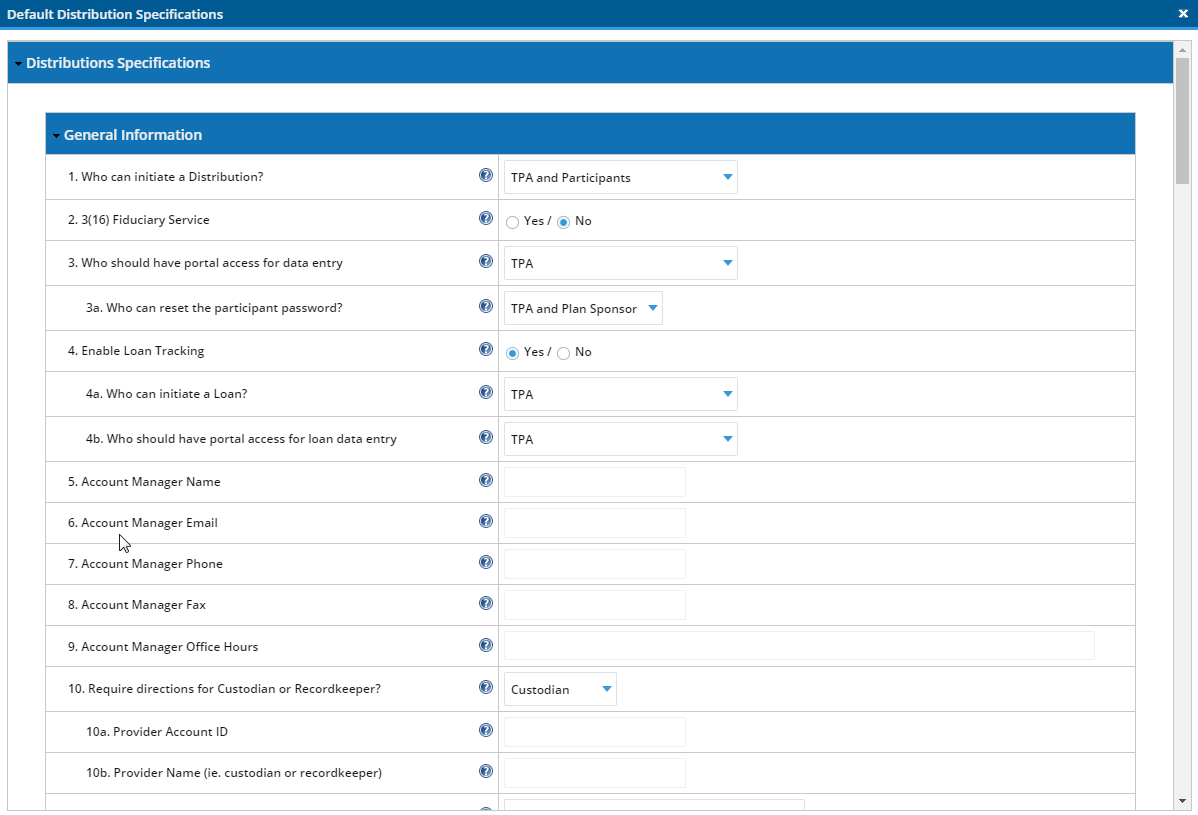
If the majority of your distribution specifications will be the same, the quickest way to set-up your specifications is via the "Default Distribution Specifications" option in the “Module Options” menu.
Everything you enter in the Default Distributions Specifications will apply to every plan in your account where you have NOT accessed DTS. If you have accessed DTS via some plans, you will need to go back and set those plans up separately. Any plans not previously accessed will automatically be updated with your default answers.
Use the help buttons to see a description of what each of the specifications questions are used for in DTS.
As an alternative to the default specifications, users may also upload specs. This is especially helpful if many of your plans will vary. For example, provider name, portal access and rollover provider may vary by plan.
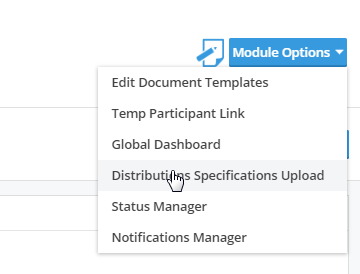
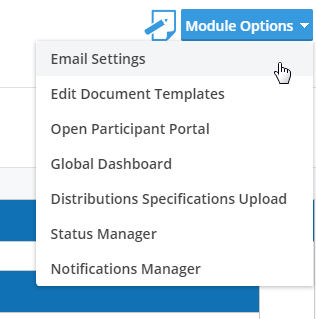
Step 1: Locate the “Module Options” button in the upper right corner of your DTS dashboard. Once located, select “Distributions Specifications Upload”.
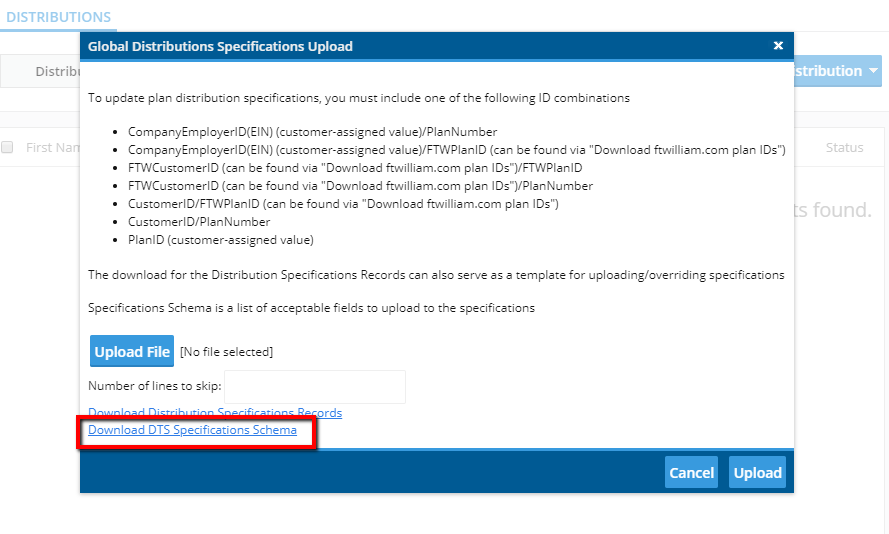
Step 2: In the “Global Distributions Specifications Upload” window, locate the link called “Download Distributions Specifications Records” and download this spreadsheet. This spreadsheet includes all of the company and plan details needed for the upload for each of the plans that already exist in your account. This is a great starting point. Save this file to your computer as a .CSV file for later use.
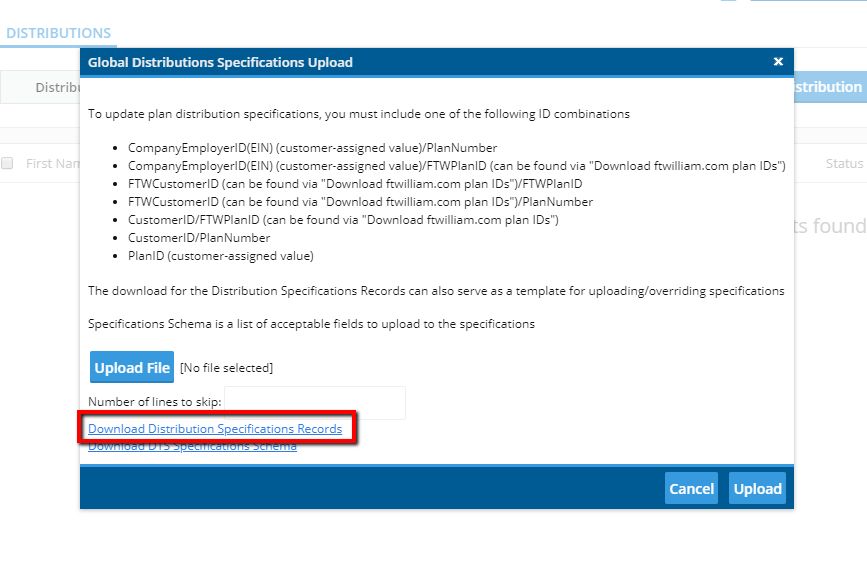
Step 3: Now locate the second link called “Download DTS Specifications Schema”. The DTS Specifications Schema is a list of acceptable fields to upload to the specifications. Without these fields, the software will not know where to map your answers.
Below is an example of the schema. The “Prompt Text” is the question that appears in the software for the DTS specification. The VAR is the header row in your specifications upload and the text that helps the software identify where to map your answer. The field type tells you if the answer is in the form of a list value or a simple text answer. The last column called “List Values” tells you what your answer options are in a drop down menu. You must use one of the options provided in order for the data to map correctly.

Step 4: Now that you have your Schema and your “Distributions Specifications Records” file, you’ll notice that the names in the “VAR” column appear as column headers in your spreadsheet with your plan data. Use the schema to help you fill out the “Distributions Specifications Records” spreadsheet. The schema indicates what the prompt text (question) will be in the DTS specifications and what the acceptable answers are, whether you’re answering a question with a list value or a simple text answer.
Below is an example of the spreadsheet containing your existing plan data. You must have these IDs in order for the software to properly map your answers within the DTS specifications. If you export existing plans, this will be populated for you and make the data entry process a little faster.

Now you should start filing in your answers for each of the columns you want populated in the DTS specifications. If you do not add data to a column, the software will simply skip that question.

Step 5: Once you are done with data entry, browse your computer for the DTS specifications. Keep in mind that if you have already filled in specifications, you can override existing answers with the upload. Any specifications you do not want to change, simply leave blank on the spreadsheet.
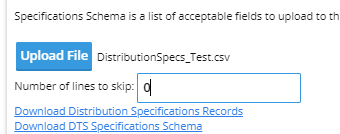
You will then want to make sure that you put a zero in the box for “Number of lines to skip” if you do not have additional rows of data above the column header row in your spreadsheet. Click the “Upload” button.
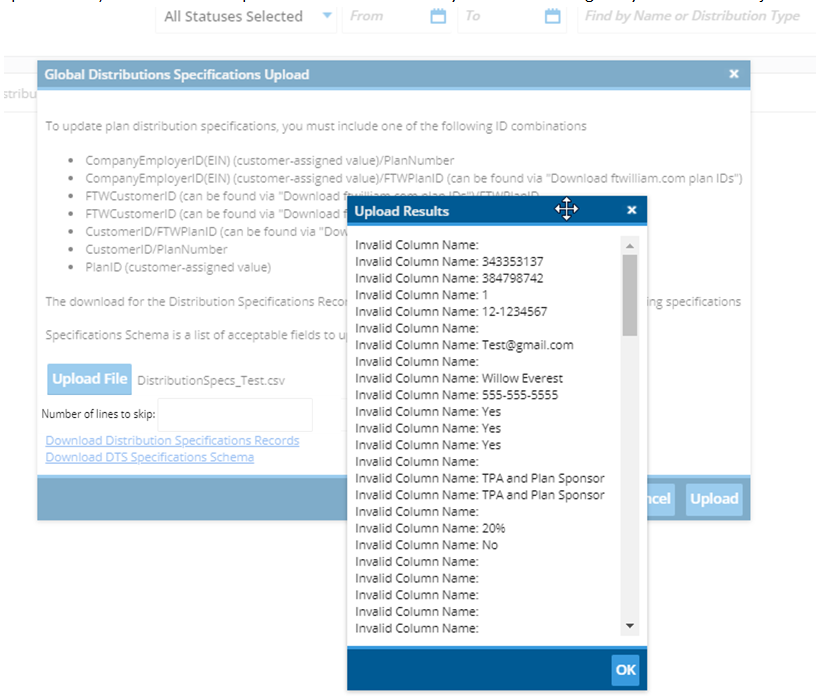
Step 6: Now that you have uploaded your spreadsheet, you should receive a confirmation on the screen. If there were any issues with the spreadsheet, the software will produce a list of errors for you to look through so you can make adjustments. Note: if any issues were presented when uploading your data, none of the data on your spreadsheet will be uploaded until all data is correct].
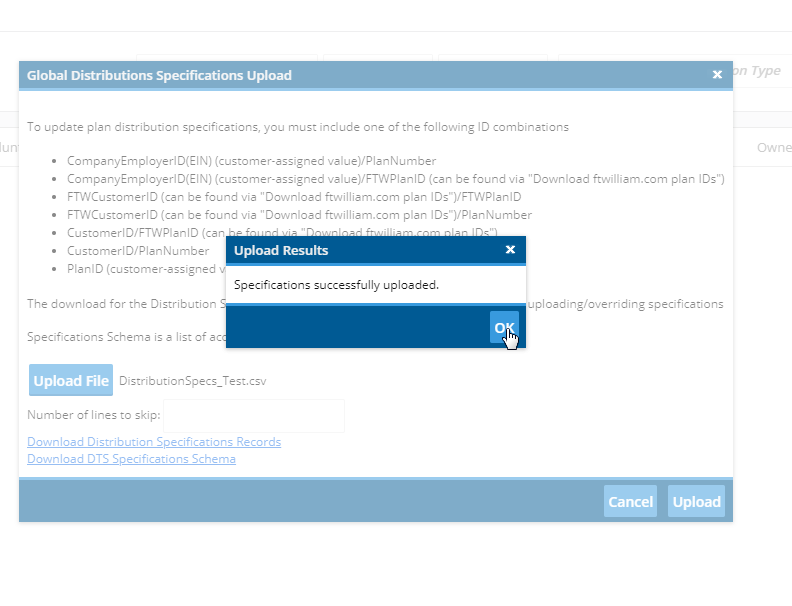
Once your spreadsheet has been successfully uploaded, you will receive the confirmation below. Once you click, “OK”, you will see that the specifications for each of your plans have now been populated.
Automatic notifications and alerts can be used to help you keep track of distributions that are still in progress and alert you to any changes or deadlines.
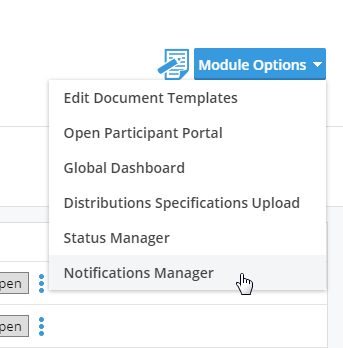
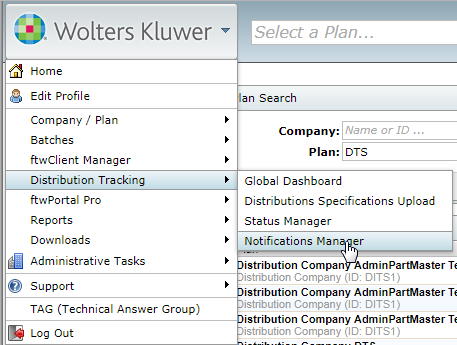
Step 1: Locate the “Notification Manager” via the “Module Options” button on the plan level dashboard. This can also be located via the “Wolters Kluwer” button on the homepage after login. Keep in mind that notifications and alerts are set at the global level so they will be the same for all of your plans.
What are Time-based Notifications and Alerts?– Time-based notifications are based on a number of days from a selected date. You indicate when the clock should start and then the number of days until your email notification and alert. You can also include a reminder if your distribution has not yet been addressed.
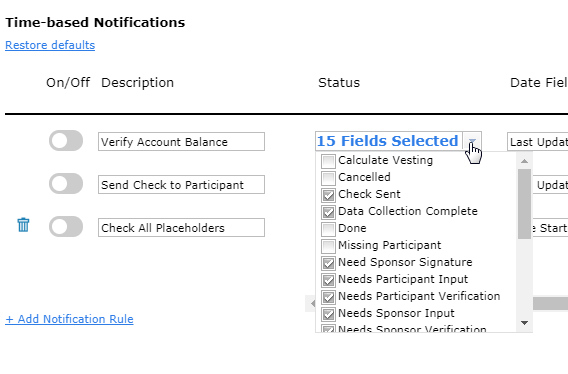
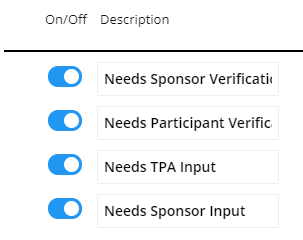
By default, the software will come with some time-based notifications activated. Please note that you can turn these off by using the “On/Off” toggle in the manager. You can also delete any notifications that you create or override what you initially set-up.
Step 1: In order to set-up a time-based notification, you will first need to give the notification a description. This is what will appear in your email notification. You will then need to indicate which statuses the notification can be linked to. For example, if you indicate that the notification should only triggered for “Needs Participant Input” that notification will only work when the Distribution status is set to “Needs Participant Input”. The notification will not work on any other status.
Step 2: When should the clock start? Now that you’ve given the notification a description and linked it with statuses, you will need to indicate when the clock should start and then the number of days until the notification and reminder.
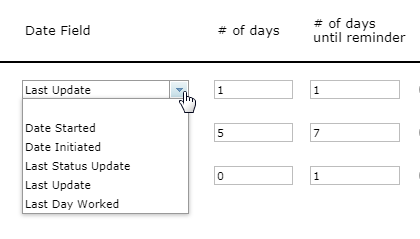
You have 5 options for when the clock should start:
Once you have chosen the date for the clock to start, you must choose the number of days from that date to receive your email notification. If you want to be reminded again after a certain number of days, indicate the number of days until reminder in the next column.
Step 3: Next, you’ll want to decide if you want to include an alert with your notification. Alerts appear as a red flag on your dashboards. When you open a distribution record, you will also see a red flag on the right side of the summary with text indicating why the alert appears.
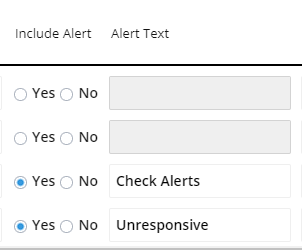
If you want to include an alert, select the “Yes” radio button and then indicate the “Alert Text” in the next column. This is the text that will appear in your Distribution Summary.
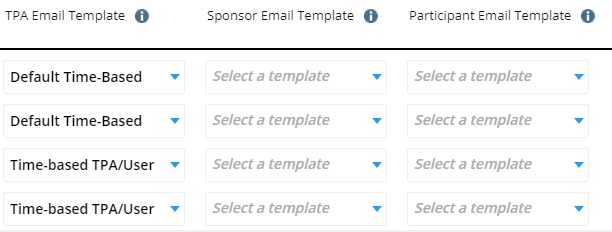
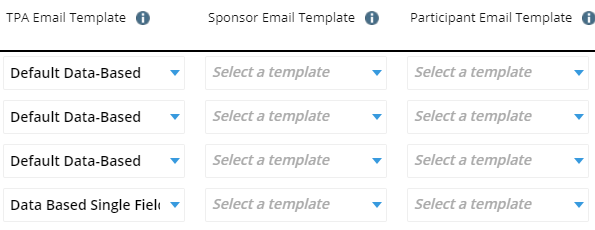
Step 4: Now it’s time to select your email template. You should see a drop down box full of templates for the TPA, Plan Sponsor, and Participant. If you choose a template from the drop down menu, this will tell the software that you want to send an email notification to this party. If you do not select an email template, a notification will not be sent. This is the template the software will use when delivering an email notification to your inbox.
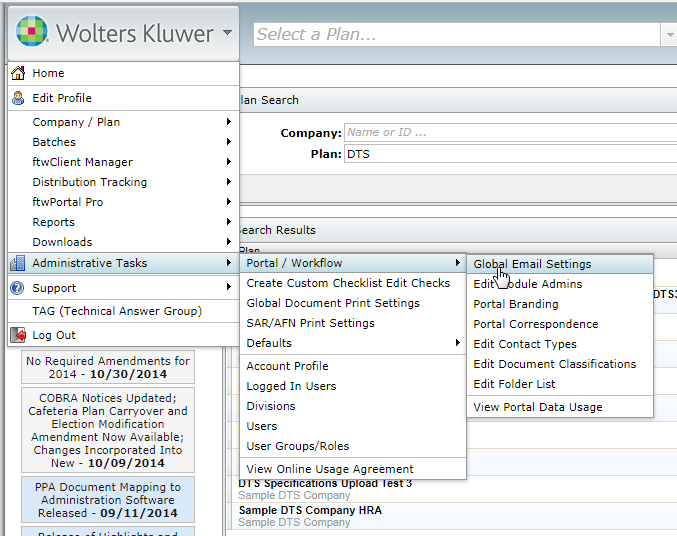
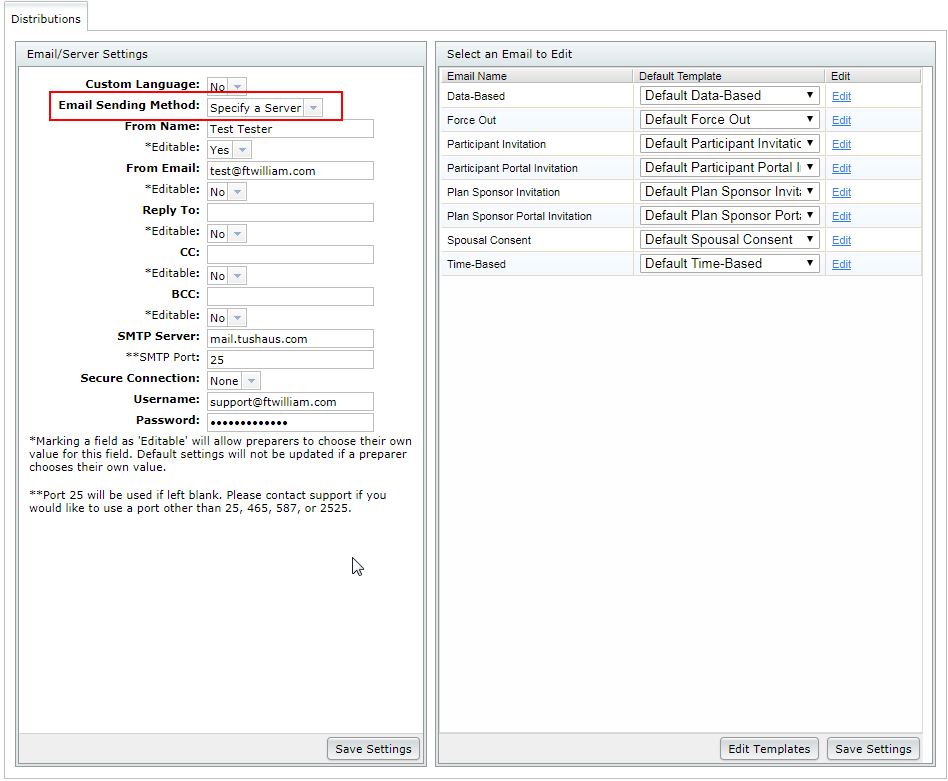
In order to edit email templates, you must be a Designated Admin or the Master User on the account to access the Global Email Settings via the Wolters Kluwer button from the home screen.
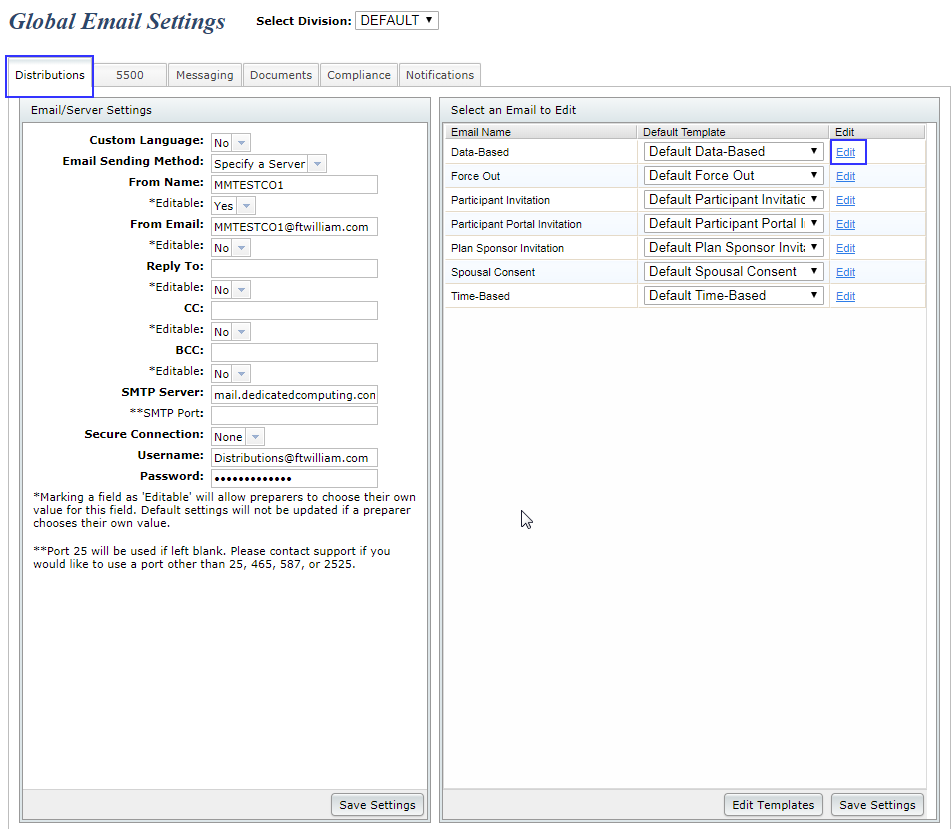
Make sure that you are on the Distributions tab and then use the “Edit” link next to the template options to edit your templates. Whatever you have selected in the drop down menu will be your default template, but this can be changed via the “Notification Manager”.
What are data-based notifications? Data-based notifications are used to notify you any time data changes within the distribution record. The most common data-based notification is a status change. By default, the software will come with some data-based notifications already activated. Please note that you can turn these off by using the “On/Off” toggle in the manager. You can also delete any notifications that you create or override what you initially set-up.
Step 1: Give your notification a description. You can do this in the text box under the “Description” column.
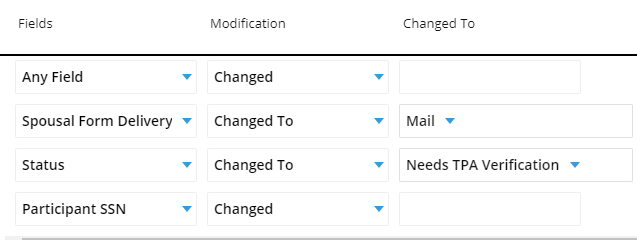
Step 2: Now you should indicate which data fields your notification is tied to, as well as the type of change and if it’s for a specific change.
In the “Fields” column, you’ll find a drop down list for every piece of data that can be collected within the data collection form. Indicate which field your notification is tied to. Next, you’ll want to indicate if you want a notification for a change in general or if the change is to something specific. If the change is specific, choose the “Changed To” option and then indicate what your data should be changed to in the “Changed To” column in order to trigger the notification.
Step 3: Next you’ll want to decide if you want to include an alert with your notification. Alerts appear as a red flag on your dashboards. When you open a distribution record, you will also see a red flag on the right side of the summary with text indicating why the alert appears.
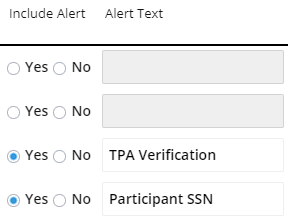
If you want to include an alert, select the “Yes” radio button and then indicate the “Alert Text” in the next column. This is the text that will appear in your Distribution Summary.
Step 4: Now it’s time to select your email template. You should see a drop down box full of templates for the TPA, Plan Sponsor, and Participant. If you choose a template from the drop down menu, this will tell the software that you want to send an email notification to this party. If you do not select an email template, a notification will not be sent. This is the template the software will use when delivering an email notification to your inbox.
Whomever you have set-up as the person responsible for the distribution or the “admin” for the plan, this individual will receive the notification specified under “TPA Email Template”.
Whomever you have set up as the “Portal Editor” in the plan specifications will receive the notification indicated under “Sponsor Email Template”.

Whatever was entered for the participant’s email address will receive the notification indicated under “Participant Email Template”
Document Template Editor Video
The Document Template Editor is used to create custom documents for your distributions. These templates can then be used to complete a distribution package for printing, a custodial directive, cover letter, etc.
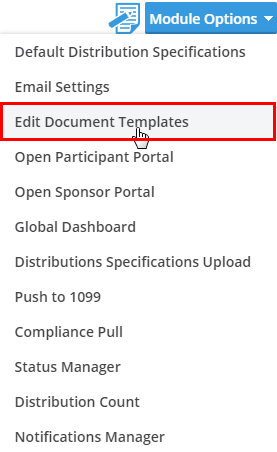
To access the ‘Document Template Editor’ click the ‘Module Options’ button in the upper right hand corner of the plan level dashboards.
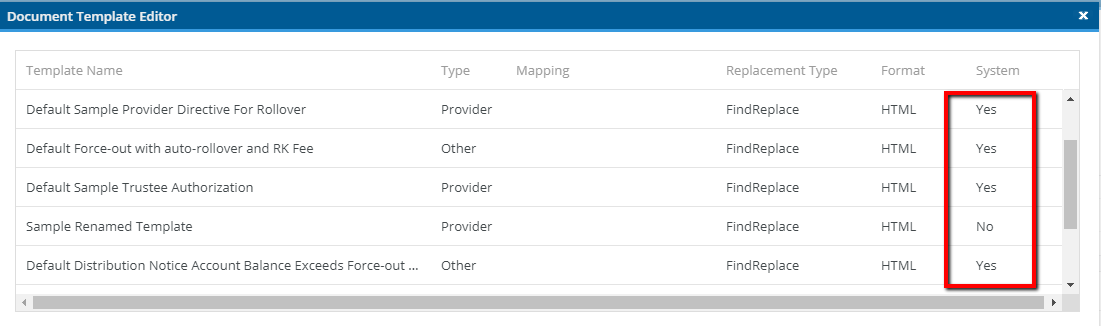
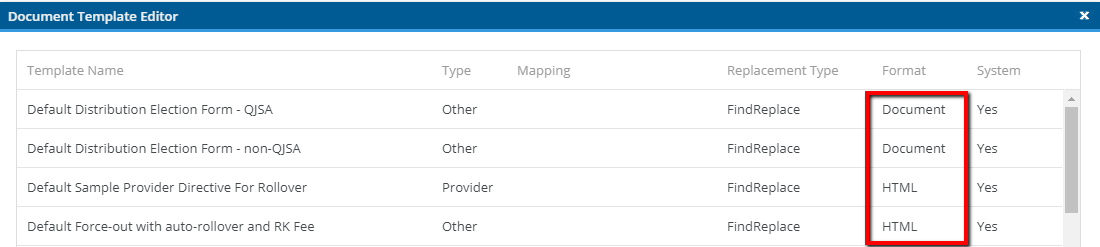
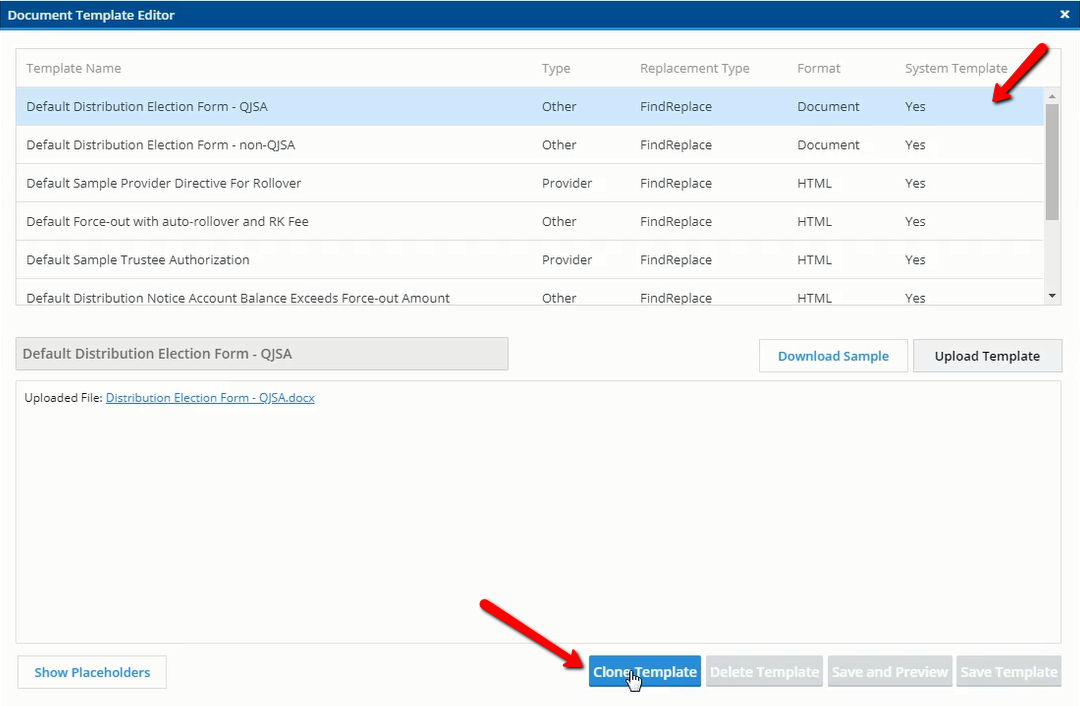
Once the editor is open, select the template you would like to edit or clone. Please keep in mind that if the template is a “System” template, that is indicated by ‘Yes’ in the “System” column. These templates may be cloned, but not edited or deleted.
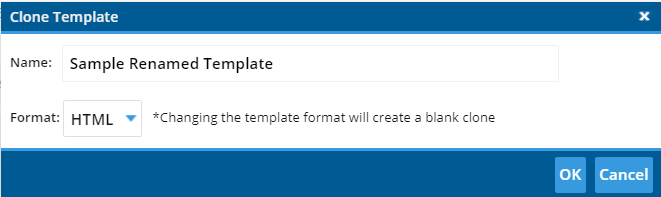
If you choose to clone your template, click the ‘Clone Template’ button in the bottom right of the pop up window.

Once cloned, you can rename the template at the time of cloning or in the box above your template formatting tools. (You are able to rename this template at any time.)
If you select to utilize the HTML Template option, you are able to edit the template from within the tool:
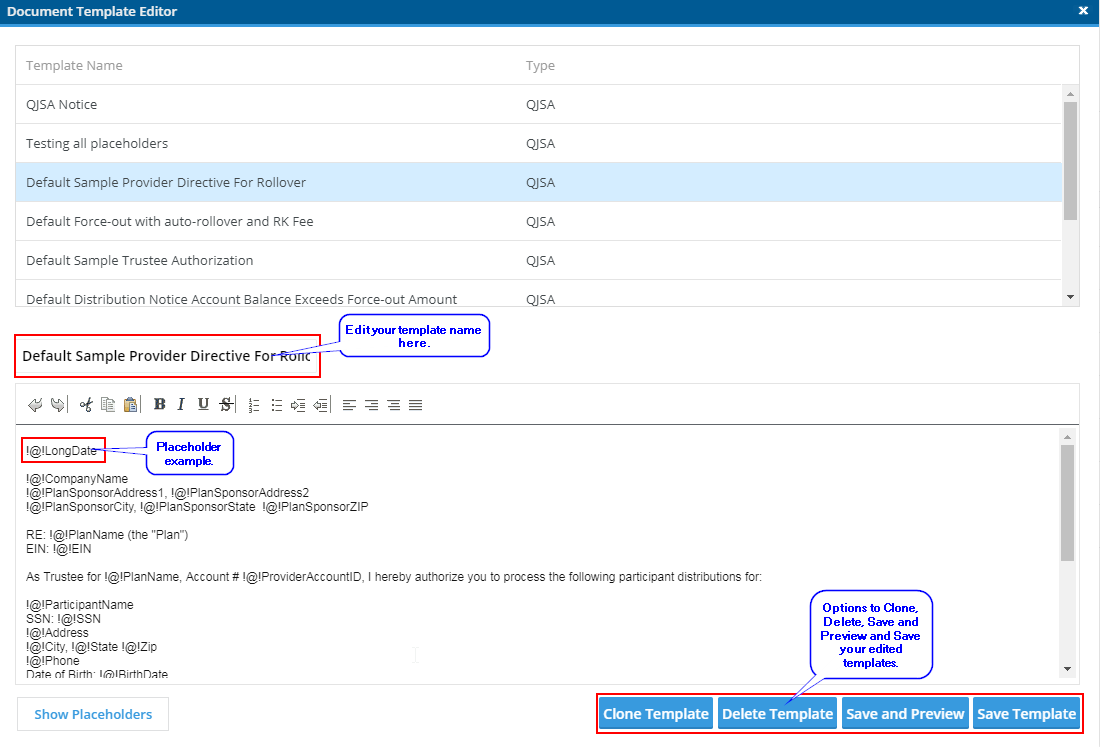
While editing, the software gives you the option to insert placeholders. Placeholders are used to populate specific data in the template when generated for a distribution. For example, if you use the placeholder for SSN in your text, the appropriate SSN would populate in that template when attached to a specific distribution. Always make sure to save your template when you are finished editing.
To show a list of placeholders select ‘Show Placeholders’ at the bottom left of the screen. This list can also be exported in Excel for easier access:

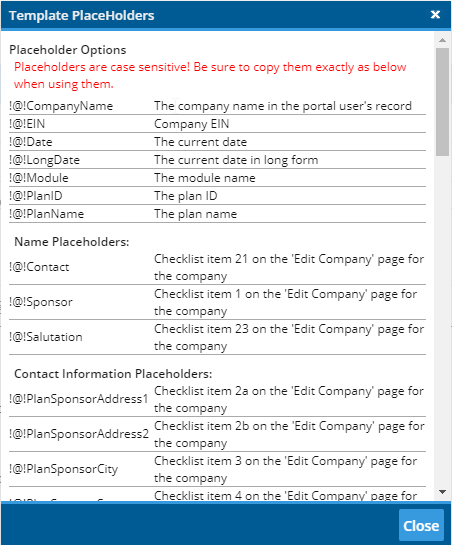
Once a template is attached to a distribution record, the software will populate that participants data inside of the template.
If you choose the “Document” format template type, you will be able to upload templates that you have on your computer into the system:
For example, if you have a merge document and you have inserted logic with your own placeholders, there is no need to recreate the file for use in the software, you will simply need to update the placeholders to match ours, and upload your existing file into the system.
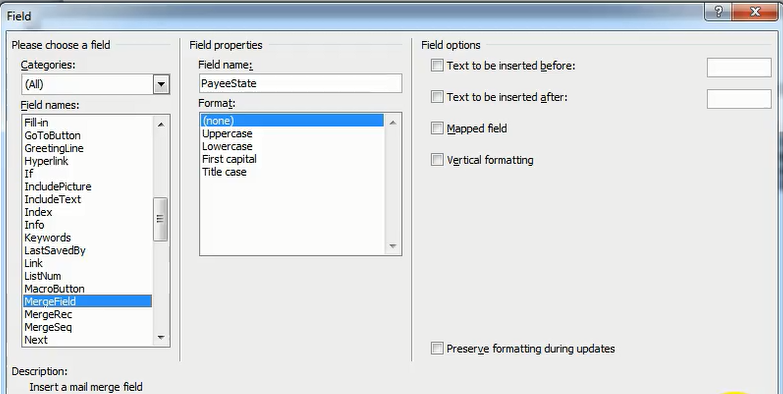
To accomplish this, select your merge file with existing logic, you will need to alter your data to match with our placeholders. Find the merge field you want to edit and right click on it to open up the editor.
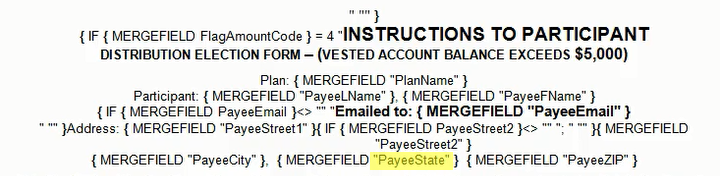
Insert the ftwilliam.com placeholder here so that the software will know where to populate data from the software into your template.
When you are finished, you will want to select an existing “Document” format template and click the “Clone” button. Next you will need to give your new template a name.
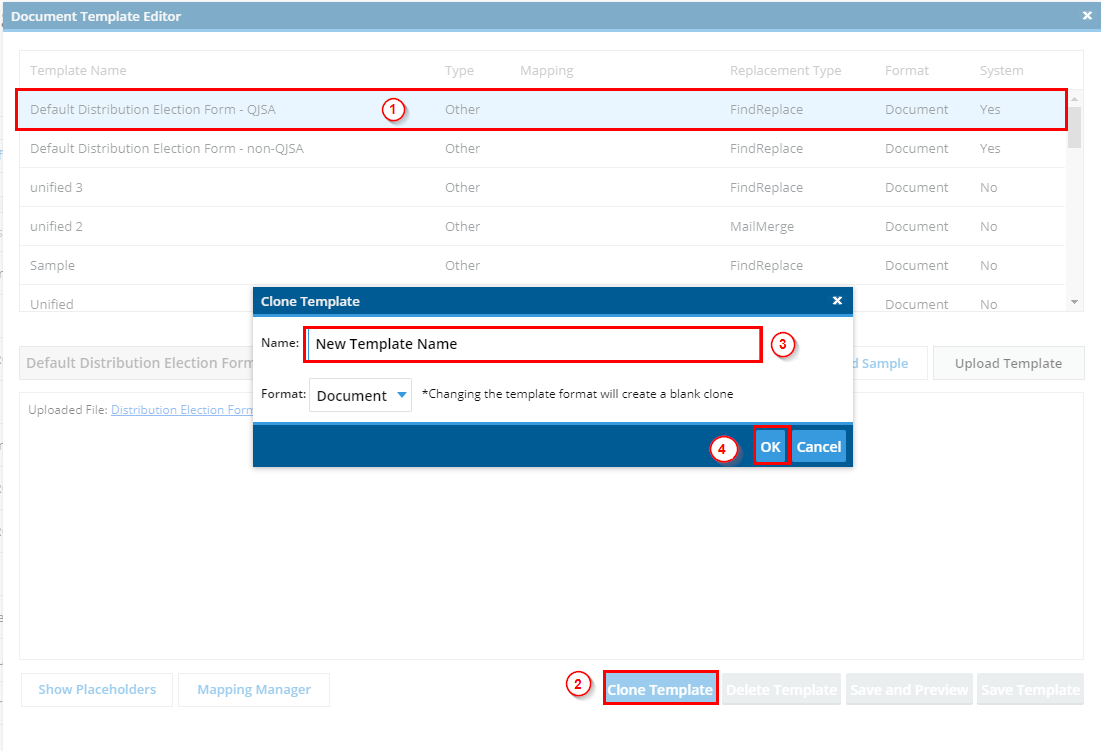
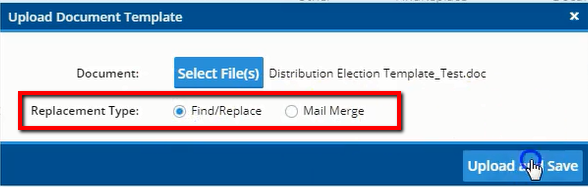
From there you will need to upload your file into the software and choose the “Mail Merge” option from the menu. When you click the “Upload and Save” button, the software will load your new template into your template library for use.
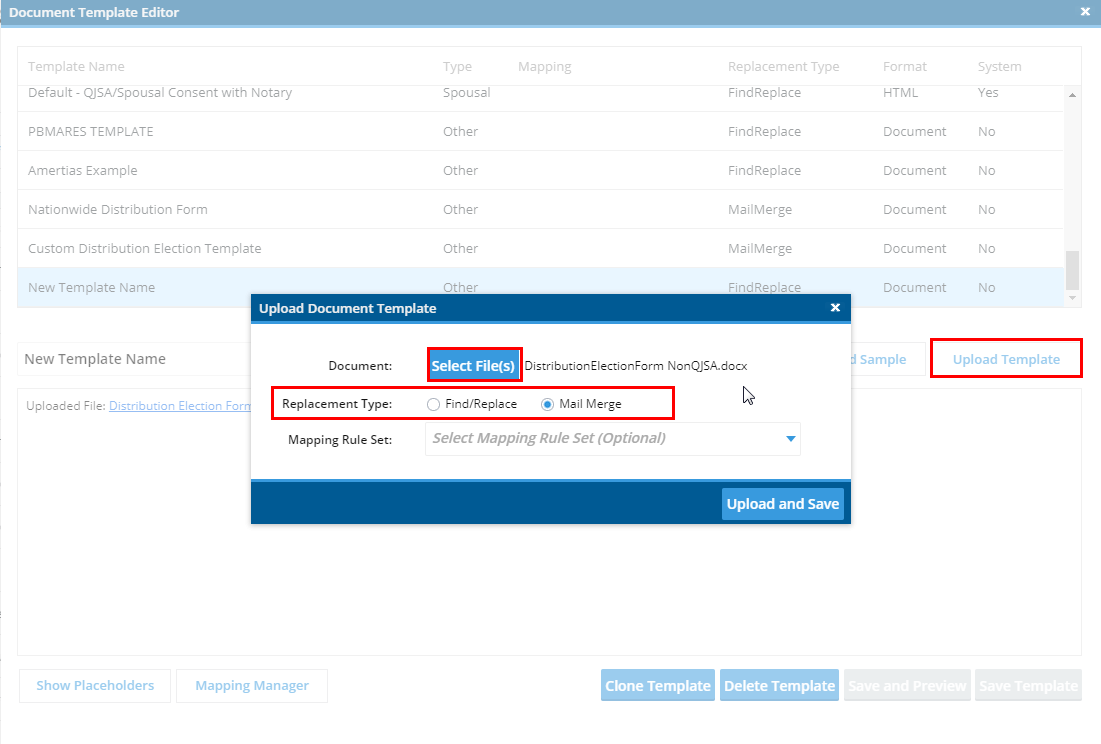
You are also able to use a Word file and fill in the forms with our placeholders. This is the “Find/Replace” option. You will need the follow the same instructions, but choose “Find/Replace” instead of “Mail Merge” when you upload your new template. Below is an example of a“Find/Replace” template set-up with ftwilliam.com placeholders.
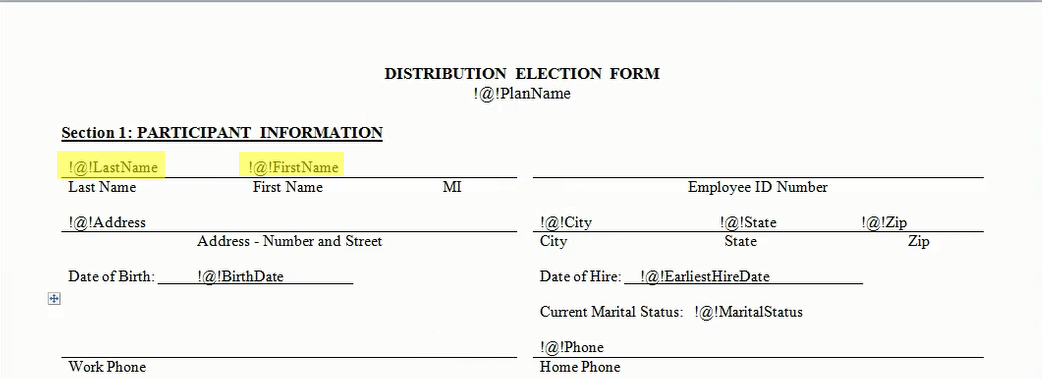
*The difference between a merge data and “Find and Replace” is with a merge file, you have logic and will need to replace your internal variable with our placeholders in order for the system to properly display the data. With Find and Replace you are just inserting our place holders into a file.
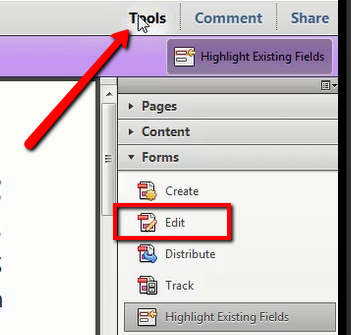
The last option is to use a record keeper form. You will need to open the form in Adobe in order to make changes. You will need to Select Tools>Forms>Edit
Then right click on the existing variables inside of the PDF and replace the fields with our placeholders. Please note that you do not need to add “!@!” when working with a PDF. Once in the system, the software will use these fields to input the proper data after the template has been attached to a distribution record.

Once your file is ready to be added to your template library, you will need to clone an existing template with the Format category “Document”. Next, click the clone button and give your template a name so it is easily recognizable in the library.
If you are uploading a record keeper form, please note, you will not need to select find and replace or mailmerge.
Once ‘Upload and Save’ is selected, the file will be made available inside of the template editor library for use.
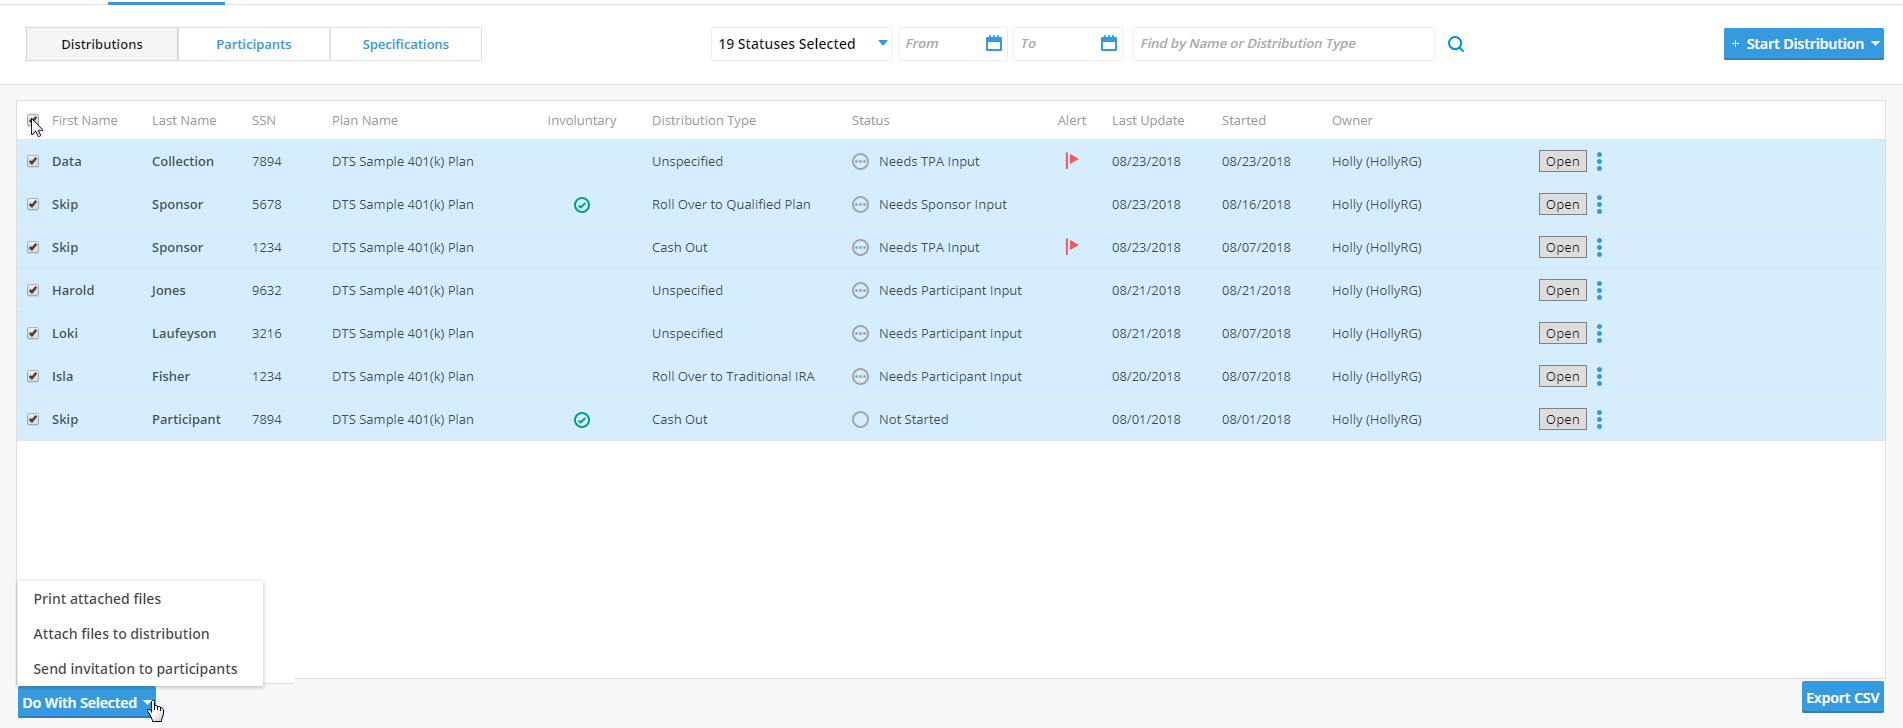
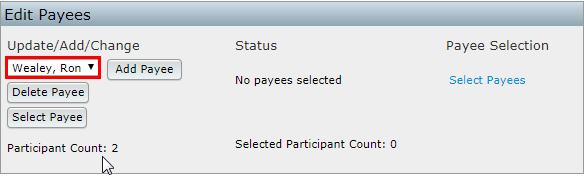
In order to use the forms, select the participants you wish to attach them to from your dashboard:

From the bottom left hand corner, select the ‘Do with Selected’ button and select ‘Attach Files to Distribution’

You will then be able to select the forms you wish to add to the participants from a checklist. Select the templates and click the ‘Attach’ button.
From here, the software is taking the data from your distributions and populating it into the appropriate fields that match the placeholders on the forms.
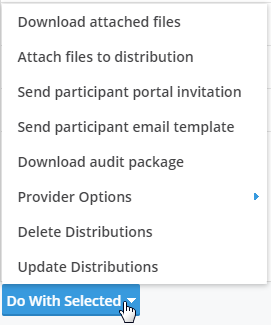
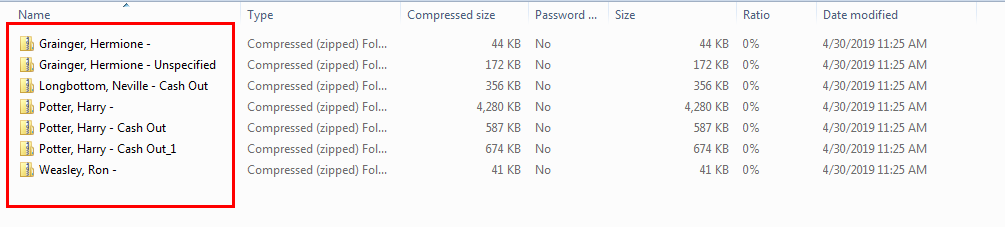
Once this process is completed, you may access a zip file with individual folders for each selected participant via the ‘Do with Selected’ and ‘Download Attached Files’ option.


All distributions forms and data are also stored inside of the distribution record. You may download your files for an individual distribution by clicking the ‘Open’ button for the desired distribution record and clicking the download icon next to the upload files link.

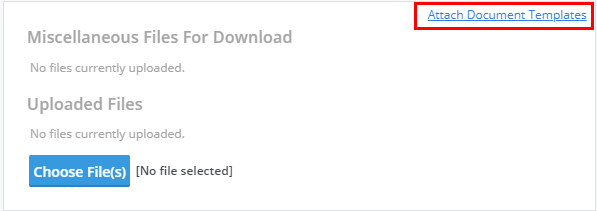
You may also attach files individually to distribution records via the ‘Miscellaneous files for download’ section on Step 2 of the distribution data collection process. Click the ‘Attach Document Templates’ link and you will be able to access your template library from there. Once you select your templates and attach them, they will be attached to your distribution record and will be available for download via the download icon.
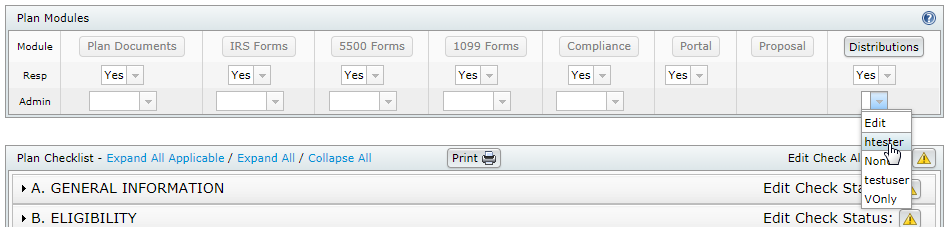
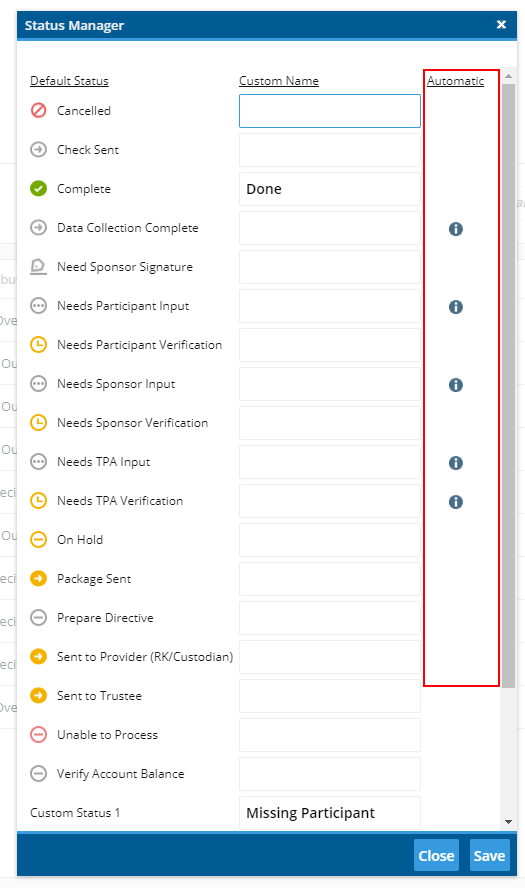
If you are a Designated Admin or Master user in your account, you can customize your statuses via the “Module Options” button in the upper right hand corner of the Plan Level Dashboard. The Statuses modal will appear listing all of the system default statuses.
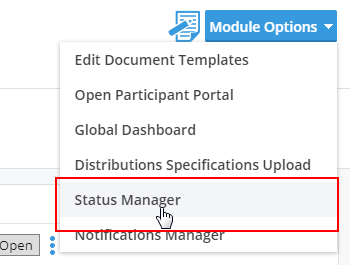
When the drop down menu appears, you’ll see three columns: Default Status, Custom Name, and Automatic. Feel free to give each status a custom name, however, we strongly discourage changing any status that is considered “Automatic”. These are the statuses that are used automatically during the data collection process. If you do decide to customize the name, we recommend that you use something similar to avoid confusion. You can also add up to five custom statuses at the bottom of the modal.
Creating Distribution and Loan Records Video
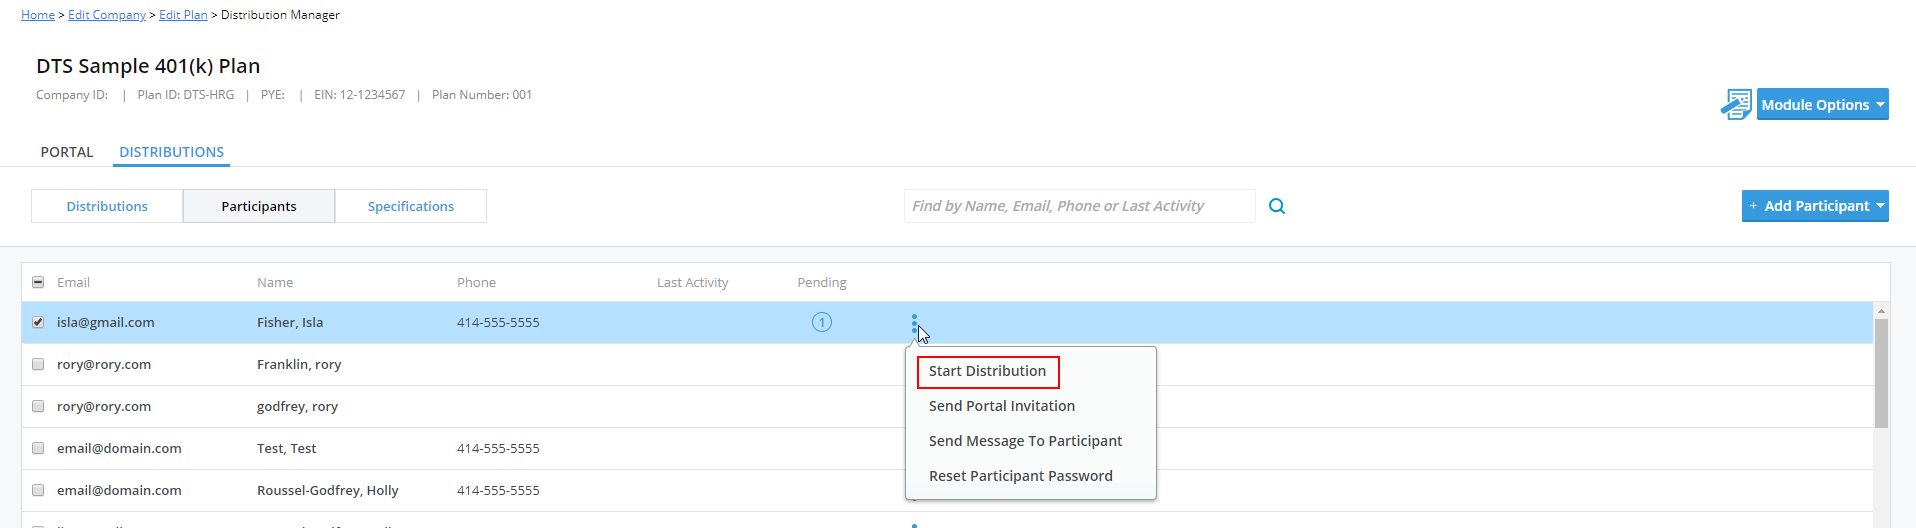
There are two ways to create a distribution from the TPA side. You can either click the “Start Distribution” button on the plan level dashboard or you can click the menu icon on the participant dashboard and select “Start Distribution”.

Clone/Split Distributions Video
The system is able to create a split distribution upon request. This is used when a participant wishes to receive their distribution in two different forms. For example, taking half of their distribution as a cash out, and half rolled into an IRA.
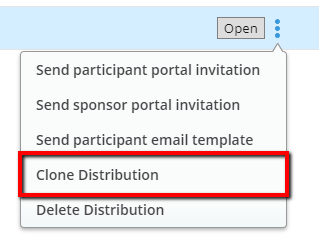
The first step to creating a Split distribution is to clone the parent record (the first distribution type). Select the Menu to the right of the distribution record on the dashboard (the three dots) and select ‘Clone Distribution’.
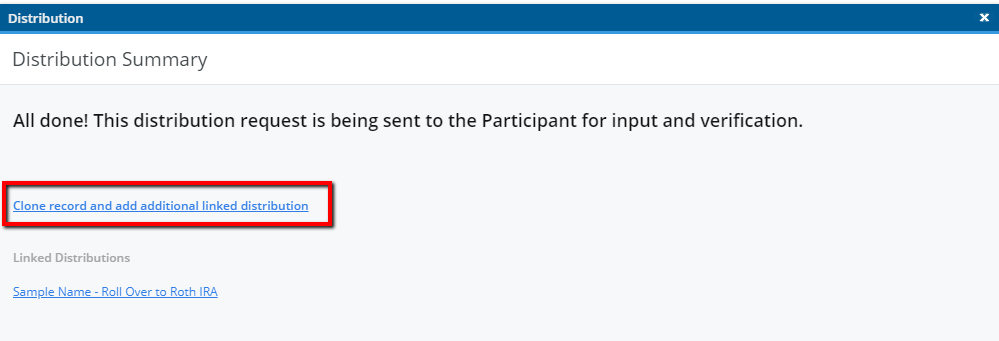
Alternatively, if you just finished the parent distribution, the confirmation screen also gives you the option to create a clone.
The system will clone Step 1 of the original distribution record and provide a blank Step 2 for indicating the second destination for funds.
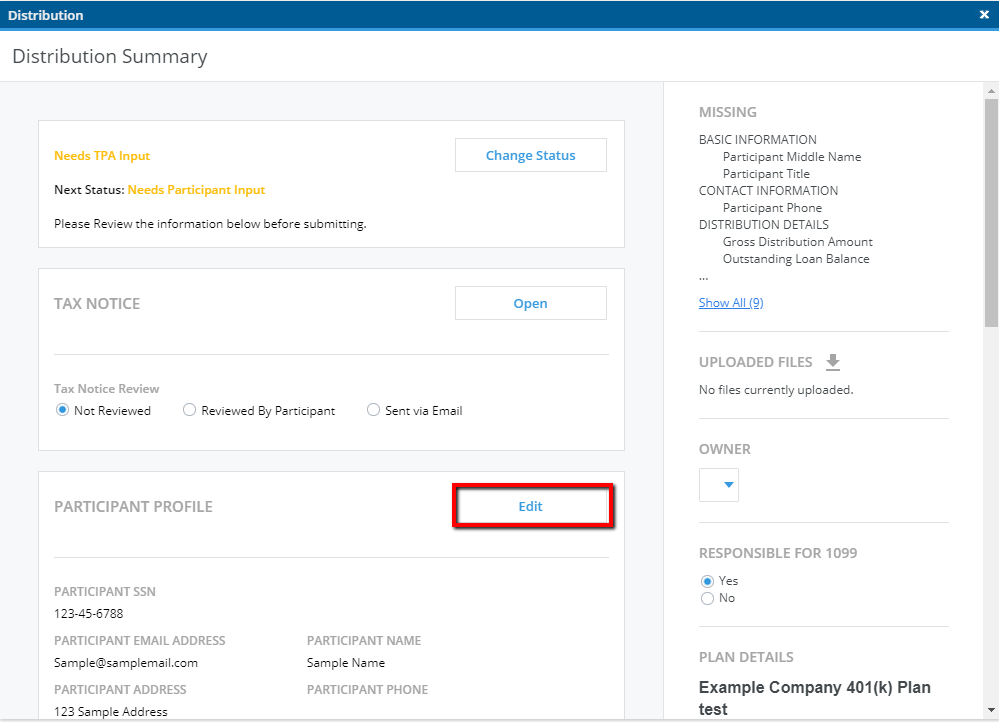
Make sure to select Edit, and verify the contact information is accurate (please note that if anything in the contact information is changed, it will also alter the records linked to the Parent distribution.)
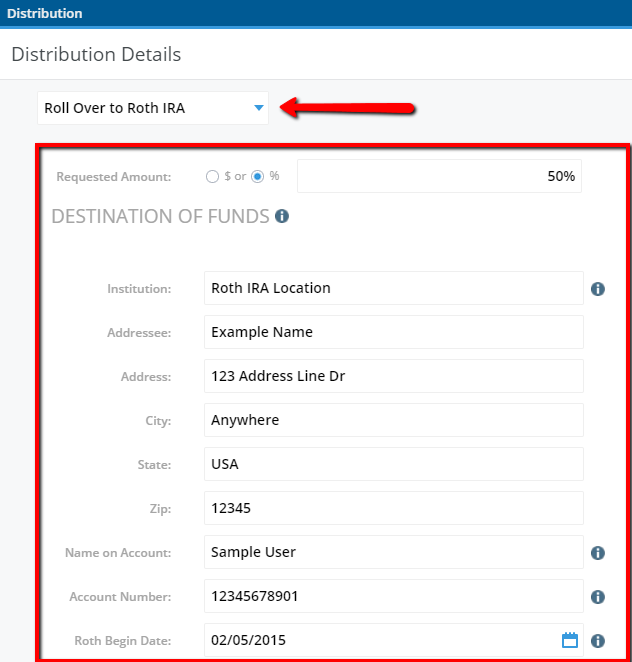
On Step 2, the only thing that is cloned is the ‘Approximate Vested Account Balance’. To finish, you will need to provide all the details for the second destination of funds:
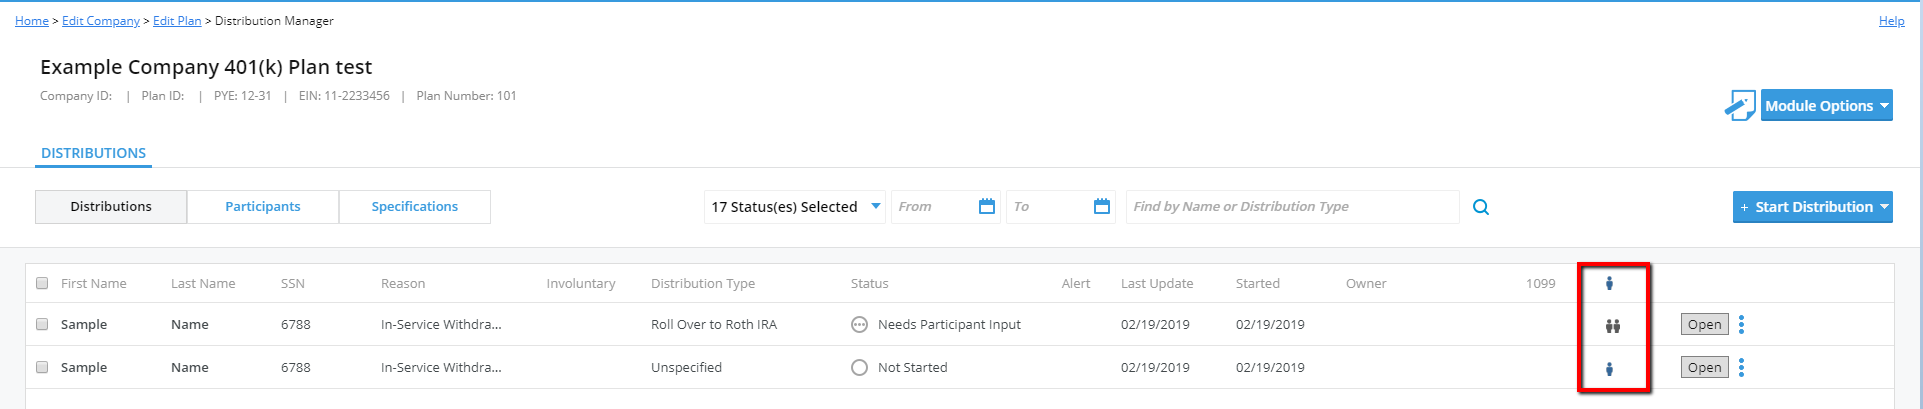
When you are finish, click ‘Continue’ to save your data and a new distribution record should appear on your dashboard. Each parent distribution (first destination of funds) is denoted by a single person icon, while clones (second destination) are denoted by a pair:
If the parent record is selected, on the distribution summary page on the bottom right, any linked distributions will be noted:

When using the Split and clone options, the software will know that two 1099s will be needed as well, and will create the two filings with the appropriate code, based on the distribution type.
Once you’ve created a distribution record, the software will automatically take you through each step of the data collection process. You have the option to fill in some of this data and invite the participant and plan sponsor to fill in the rest or fill it all in yourself. You also have the option to turn off portal access for certain parties as well as their ability to initiate a distribution. This is done via the DTS Specifications tab.
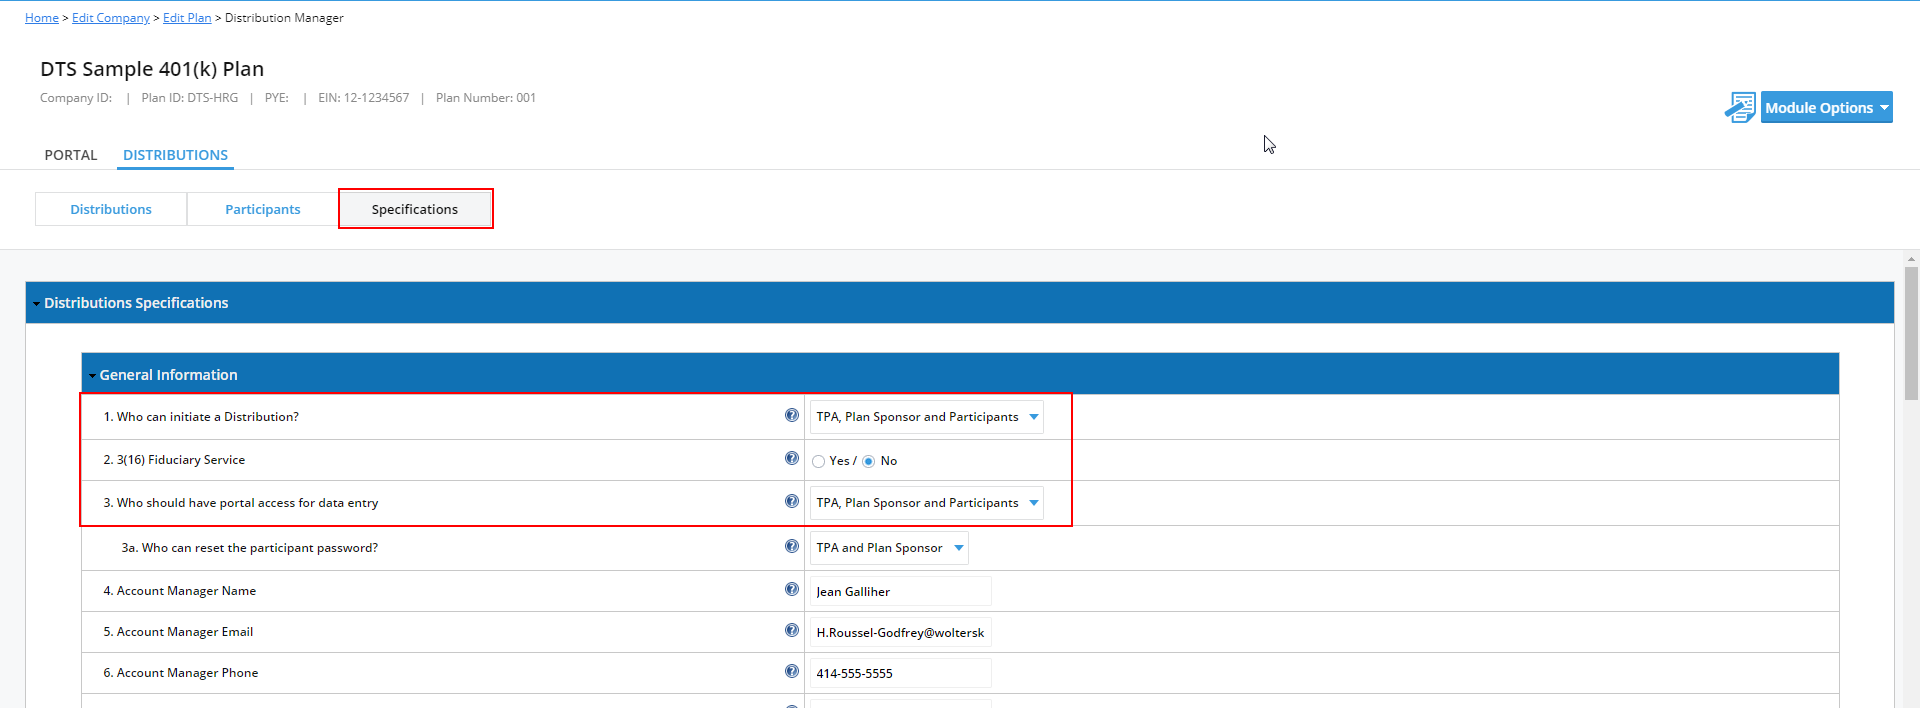
Once you are in the “Specifications” you’ll notice that the first three questions address initiation and portal access. In the first question, “Who can initiate a Distribution”, you should choose the option that best fits your process. Some users will not want to give portal access to a certain party where others will give access to everyone.
The second question, “3(16) Fiduciary Service”, is intended to skip the Plan Sponsor during the data collection process. The software assumes that you have all of the data you need and do not need to contact the Plan Sponsor.
The last question, “Who should have portal access for data entry,” is intended to tell the software who should have access for viewing and editing the distribution record via the portal. During the data collection process, the software will begin first with the participant. Once the participant is done with data entry, the software will invite the Plan Sponsor. The TPA is the final party to review and confirm that data collection is complete. This will change based on your selections in this section. For example, if you do not give the Participant portal access, they will be skipped during the data collection process.
If you use ftwPortal Pro or our Form 5500 Software, your plan sponsor will use the same credentials to log into the portal. If the participant is logging into the portal for the first time, they will receive an email containing a temporary password when you or the Plan Sponsor initiates the distribution. After confirming their identity by entering the last four digits of their social security number and their date of birth, the software will allow them to reset their password and begin data entry. The participant will use the same username and password from that point forward.
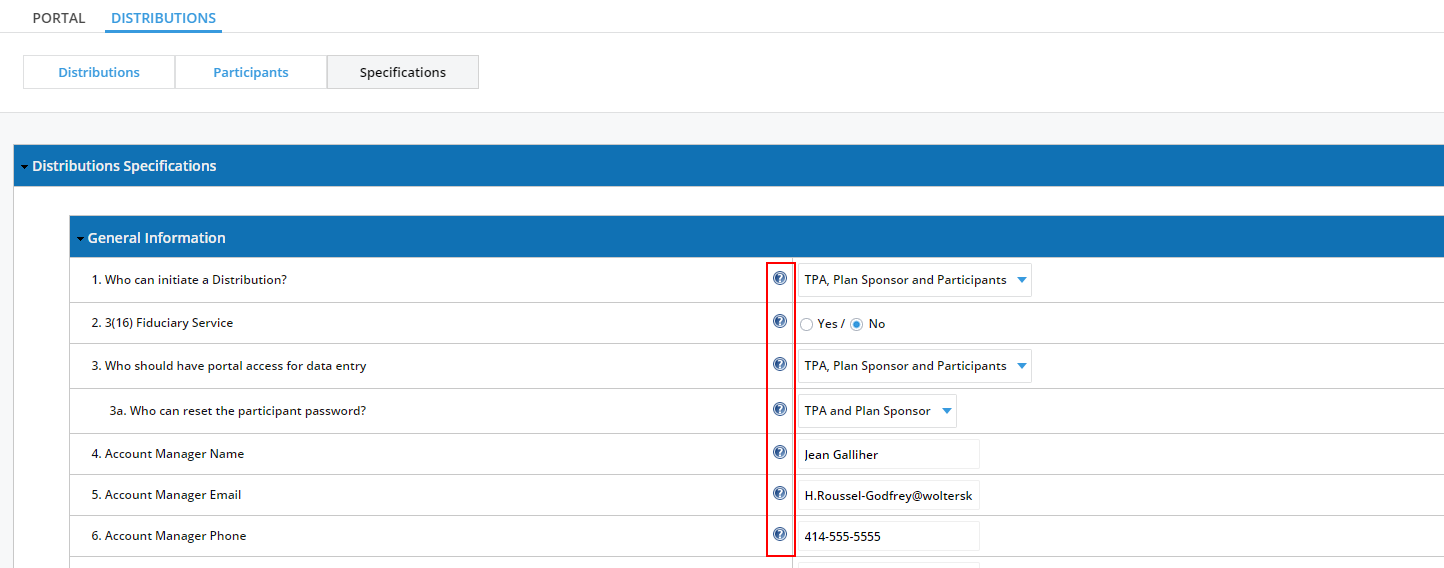
You will also want to take the time to look through the other specifications provided. This drives much of what you will see during the data collection process. This information can also be uploaded via our “Batch DTS Specifications Upload” for all of your plans at once. Use the help button to help determine where each specification will appear in the data collection screens.
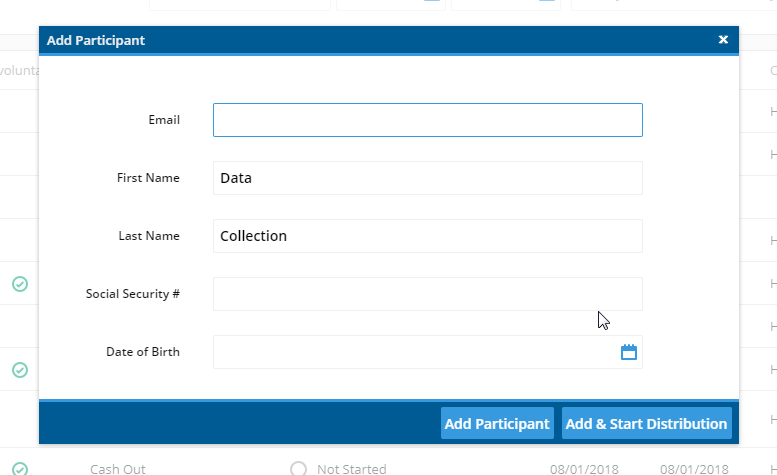
First click the “Start Distribution” button in the upper right hand corner of the plan level dashboard as displayed above. Next, enter the name of your participant.
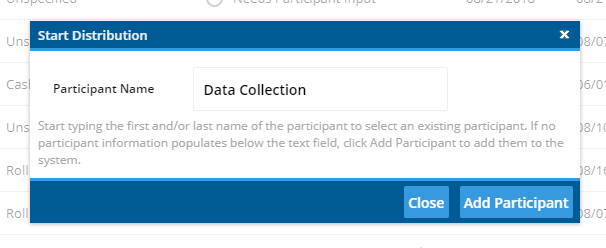
Now you will be asked to fill in the email address, social security number, and date of birth for your participant. If the participant already exists in the system because you use our Compliance software, or this participant has requested a distribution in the past, these screens will automatically be bypassed and your participant data will pre-populate for you.
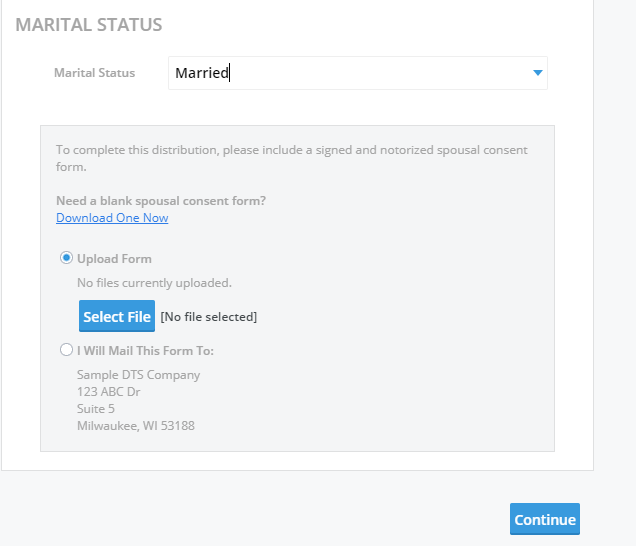
When finished, you’ll be redirected to Step 1: Participant Profile. Please note that the fields in the “Employment Information” section will be locked for the participant. Only the TPA and Plan Sponsor can edit these fields. If Marital Status is “Married” a new section will appear giving the participant the ability to download a spousal consent which they can then send back to you via the portal or via mail. You can upload your own spousal consent and provide a mailing address in the plan specifications. If you do not upload a spousal consent, ours will be used by default.
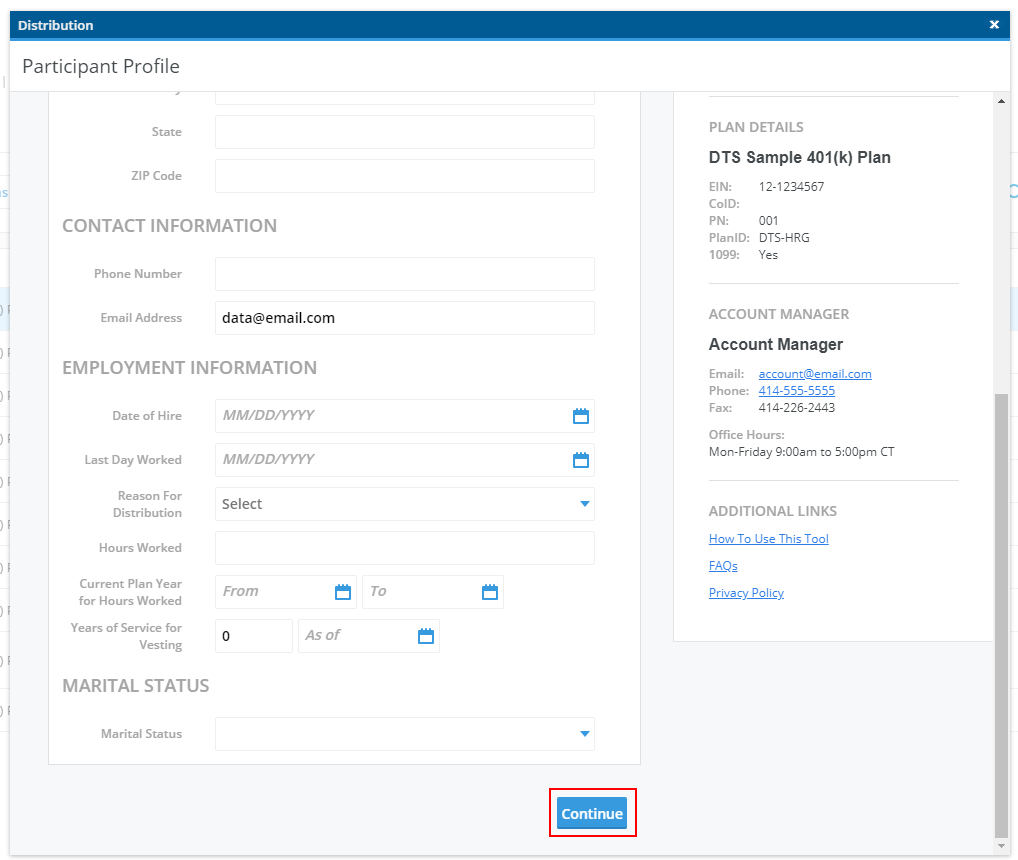
Fill in the data needed for your process and then click the “Continue” button at the bottom of the screen to progress to Step 2: Distribution Details.
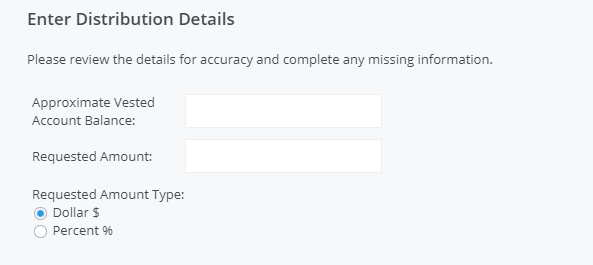
In Step 2: Distribution Details, the “Approximate Vested Account Balance” will be locked for the participant and the plan sponsor. Anyone can enter the “Requested Amount” and choose the “Amount Type”.
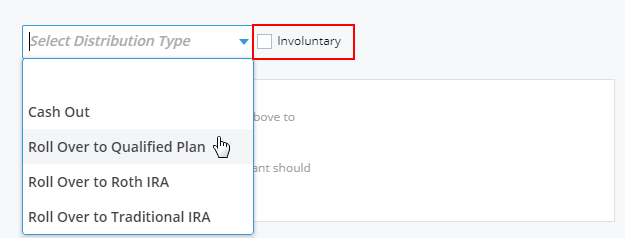
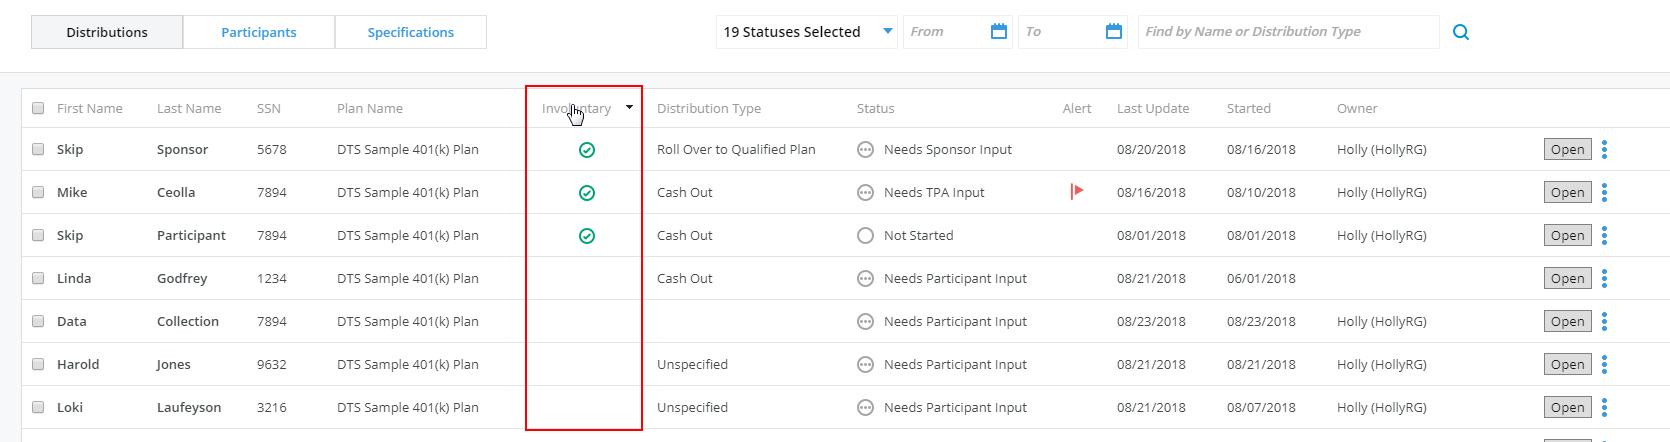
In the next section, anyone can choose the Distribution Type and provide the details, however, only the TPA can select the “Involuntary” checkbox. This checkbox is meant to be used for distributions that are part of a force-out campaign. When this checkbox is selected, a green check mark will appear next to the distribution on the global and plan level dashboards. You can sort on the “involuntary” column to easily identify distributions that are part of your campaign.
Depending on your “Distribution Type” you may need to fill in more or less data. Keep in mind that this section can be completed by the plan sponsor or the participant. Once their data entry is complete, you’ll be notified that the distribution now needs “TPA Verification”.
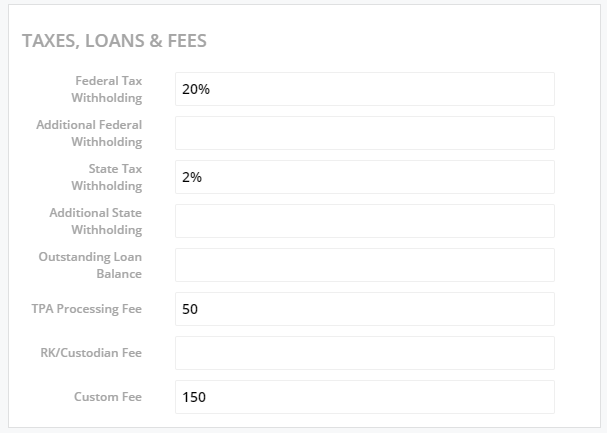
The next section on this screen, “Taxes Loans & Fees” is controlled by the plan specifications. You can completely remove this section or customize it for your process. This section is also locked for the plan sponsor and participant. They can, however, add additional withholding if you provide the option via the plan specifications.
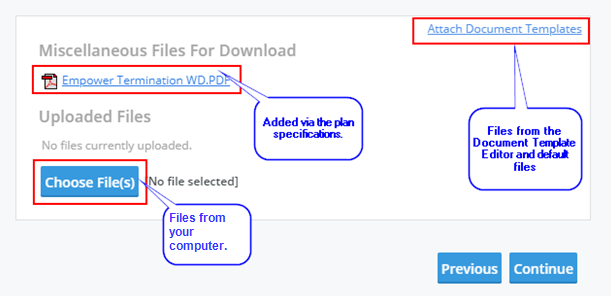
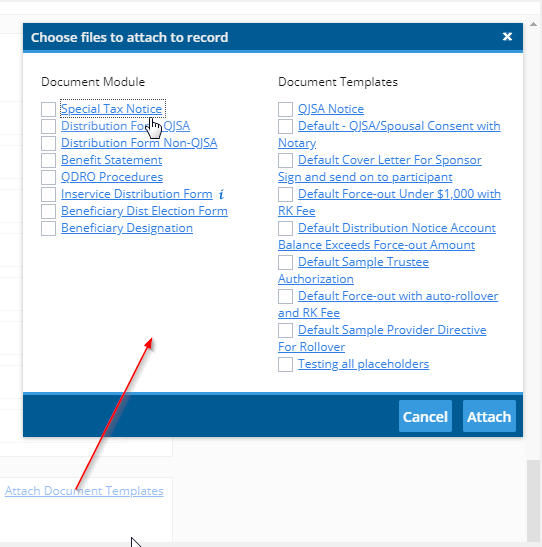
The last section can be used to upload additional files you would like the participant to download. Files are added a few different ways. The first way is via the “Choose Files” button. These files are from your computer. The second option is via the plan specifications. If you upload a file in Question 21, this file will appear in all of the distribution records for that plan. The final way is via the “Attach Document Templates” link. This link will give you a list of templates you created via the “Document Template Editor” as well as documents we provide all customers by default.
If you’ll be using the “Attach Document Templates” option, a modal will appear on your screen with a list of options. Simply select the checkbox for each document you would like to include. When you add a file via the modal to the distribution record, any placeholders that were used in the creation of the document will auto-populate with the participant’s data. See instructions for the “Document Template Editor” for additional information.
Any files you added should now appear under the “Miscellaneous Files for Download” box.
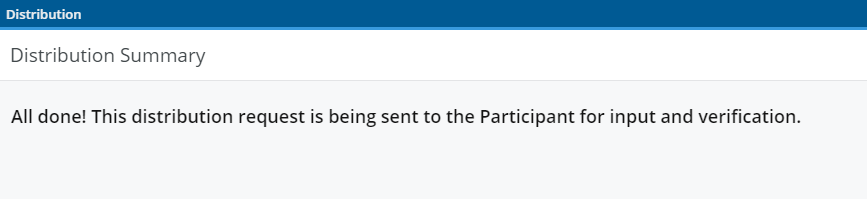
In Step 3: Distribution Summary, you will now have the ability to review all of the data you provided before sending it off to the next party in line for data collection, based upon your specification answers for initiation and data collection. Once you click “Continue” at the bottom of the screen, you’ll be taken to a confirmation that the distribution is now being sent to the next party in line.
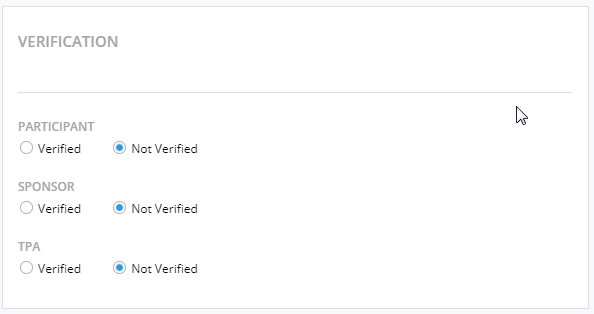
If you want to skip the participant or the plan sponsor during the data collection process, you will have the option to select the radio button for “Verified” before submitting the distribution. While this can be set-up on the plan level via the plan specifications, you can also skip a party on the distribution level in this section.
Once the plan sponsor and participant have done their data collection, you will receive a notification that the distribution now needs “TPA Input”. The status will also be updated on the global and plan level dashboards. Visit the Notification Manager instructions for details about email notifications.

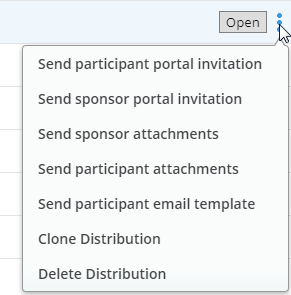
Each distribution record has a menu option next to the “Open” button on the dashboard. Users have the ability to resend portal invitations, send distribution attachments via email, clone distributions, and delete distribution records.
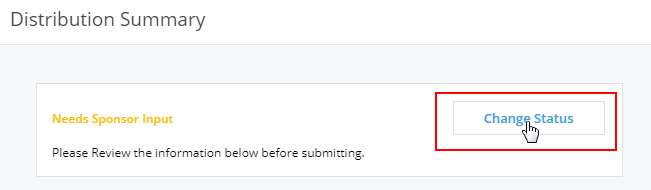
While statuses can be changed automatically during data collection, they can also be overridden via the “Distribution Summary”. Simply click the “Open” button on the distribution dashboard and then click the “Change Status” button at the top of the page. A drop down box will appear listing all of your statuses.

The distribution summary holds all data and files associated with a distribution. It is important that you make yourself familiar with all of the features included in the summary.
Activity Log
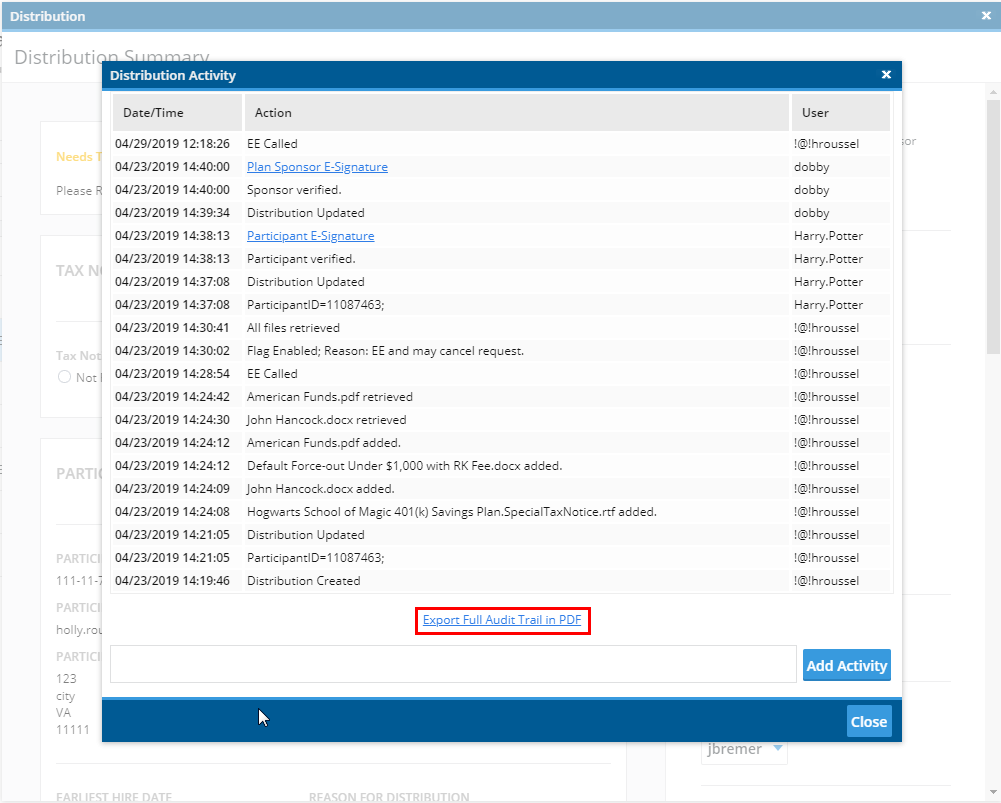
The first block in the “Distribution Summary” provides an activity log for the distribution. This is a great audit trail to reference when you are trying to figure out the last time a distribution was touched and by whom. On the main summary screen, the software will display the date the distribution was started, the date it was last submitted, the date it was last saved, and finally the date it was marked completed. By clicking the “View Activity” link you will see a full audit trail with a date/time stamp and the user connected to the activity. If an email was sent or an e-signature was done via the portal, there is a link provided that enables you to see the full body of the email that was sent and the e-signature details. You may also export this information in a PDF file via the ‘Export Full Audit Trail in PDF’ link at the bottom of the modal.
In the event that activity happens outside of the system, there is an option to add activity manually by clicking the “Add Activity” button. The software will log the text you supplied with a date/time stamp and attach it to the user who added the activity.
Alerts
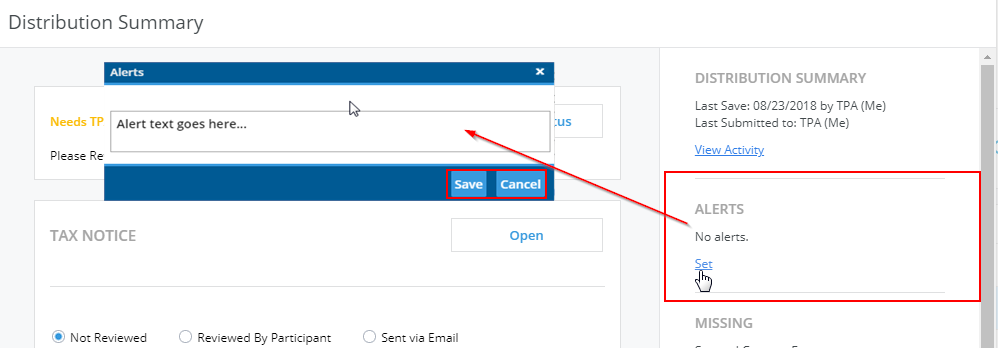
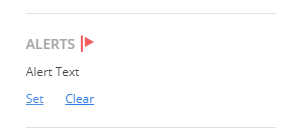
The alert section is meant to draw your attention to something important regarding the distribution. These can be set automatically with notifications in the Notification Manager or set manually in the “Distribution Summary”. Click the “Set” link and a box will open giving you a space to type your text. Once you set your alert, it will appear with a red flag under the Alert section. This will also create a red flag on your Global and Plan level dashboards.
If you decide to add additional text or you have a manual and automatic alert, the software will append the text to add additional alert text.
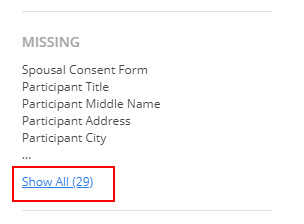
Missing
In the section called “Missing”, the software provides a list of data points that have not yet been provided. As you or other parties fill out the data collection form, these line items will fall off of your list. Click the “Show All (XX)” link to display the full list of Missing data.
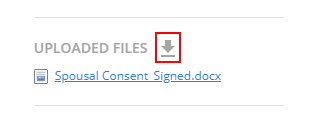
Uploaded Files
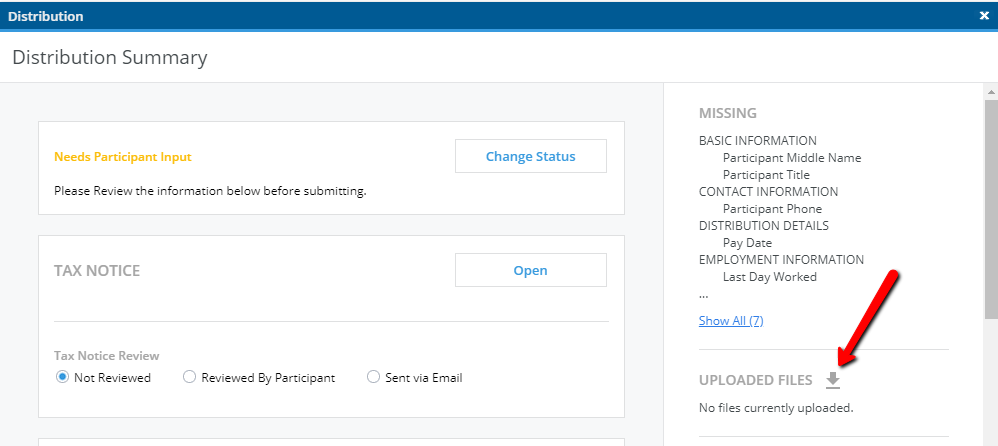
The “Uploaded Files” section will display any files that were sent to you via the portal by the Participant or the Plan Sponsor (i.e. Spousal Consent, Check Request Form, etc.). In addition, you will notice a download files icon to the right of “Uploaded Files”; by clicking on this icon, the software will export any files that you uploaded for the Participant through DTS. This was likely done via the “Upload Miscellaneous Files” section of the data collection form or through the “Do with Selected” tool on the dashboards.
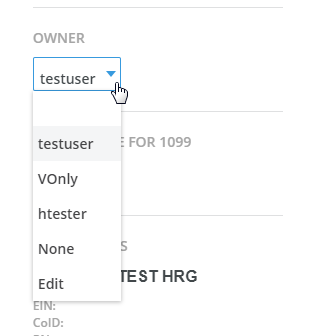
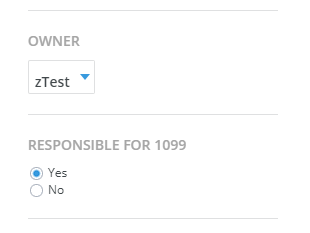
Owner and Responsible for 1099
The next two sections, “Owner” and “Responsible for 1099” can be set at the plan level on the “Edit Plan” screen, but the default can be overridden on the distribution level in this section. For “Owner”, this drop down menu will display all of the users in your account. The software will display the user internally responsible for the distribution on the Global and Plan level dashboards.
The “Responsible for 1099” radio button will allow you to indicate if you are responsible for the 1099 on the distribution level. This is ultimately what tells the software which distributions should be loaded into the 1099 Forms at the end of the year.
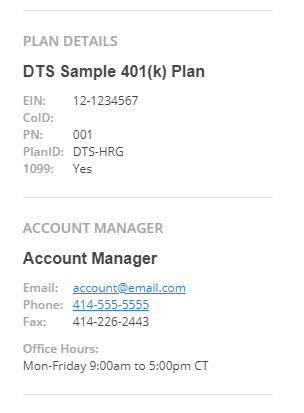
Plan Details and Account Manager
The last two sections, “Plan Details” and “Account Manager” are set-up via the specifications tab. The Account Manager is the person at your firm internally that is the day to day contact for the plan. This person may differ from the individual responsible for the distribution.
The “Do With Selected” tool can be used to batch generates documents you created via the “Document Template Editor” along with forms provided by default from the ftwilliam.com Plan Document software. These forms are provided even if you do not subscribe to our Document Software Module.
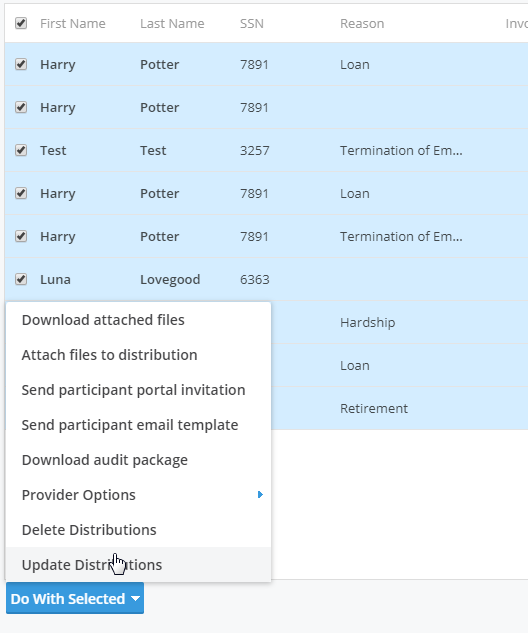
The first step in the process is to select which participants you would like to create documents for. This can be done by selecting the checkbox on the left side of the grid next to your participant’s name. If you would like to create documents for all participants at once, you may use the top checkbox located next to “First Name” on the grid. Once your participants are selected, click the “Do with Selected” option in the bottom left corner of the grid for options.
The next step in the process is to choose which files you would like to batch create. You do this by first clicking “Attach files to distribution”. This will automatically attach all of the selected files to the distribution record. Rather than saving the files to your computer, everything is conveniently stored in the distribution record for your reference and can be re-printed at a later date.
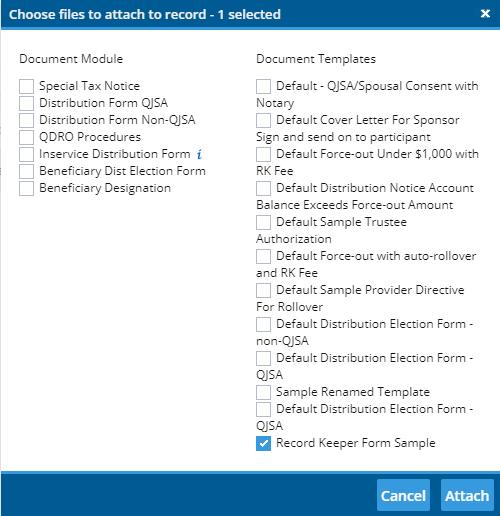
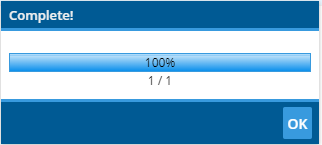
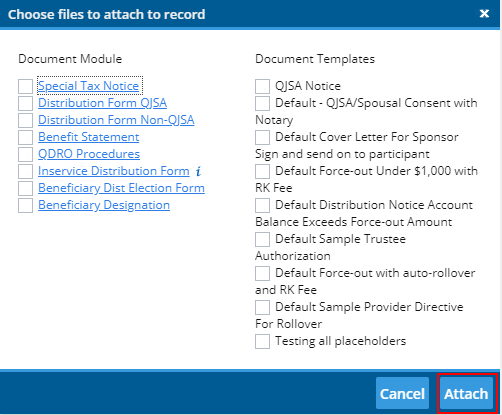
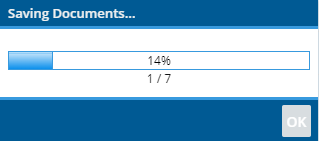
Once the “Choose files to attach to record” box appears, simply check the box next to the forms and document templates you would like to include. Remember, if you inserted placeholders in your templates during set-up, those placeholders will automatically pull in the appropriate participant data into your documents for saving and printing. After you’ve made your selection, click “Attach” and the software will produce a confirmation letting you know when the process is completed.
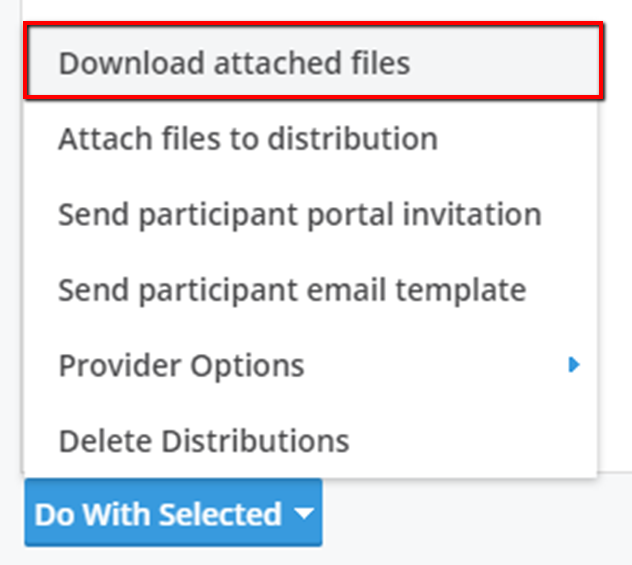
When the software is finished attaching your files, you can then proceed to batch printing. Click the same “Do with Selected” menu button and instead, click “Download Attached Files”. By doing this, the software will automatically create a zip file for you to download with an individual folder for each of your selected participants. Your files will be located inside of these folders for you to print.
Send participant portal invitation and send participant email template
You may also use the “Do with Selected” menu for sending attached templates and invitations to the participants in batch. This will send each of your selected participants an email notification inviting them to log into the participant portal for data collection or to download files. This can be used in conjunction with the batch Distribution Upload if you choose to not send the invitation at the same time the Distribution records are created. This option is only available if you use the “Specify Server Settings” in the “Email Settings” menu. You can access the “Email Settings” via the “Module Options” button.
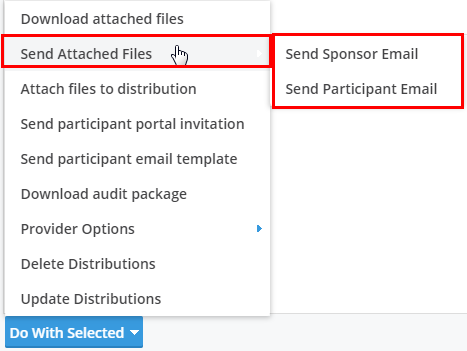
Once your files attached, you will also have the option to send these files via email to your plan sponsors and participants. Select “Send Attached Files” from the “Do With Selected” menu. When your recipient receives your email, they will need to enter their username and password before the files may be downloaded. If your recipients do not yet have a login, the first email the user receives will contain a link with a temporary password. Once the user enters their username and temporary password, they will need to then enter the last four digits of their SSN and DOB. The software will then have the user create a new password. Once this process is done, they can download attachments. Any emails sent via the batch tool will be logged in your audit trail automatically.
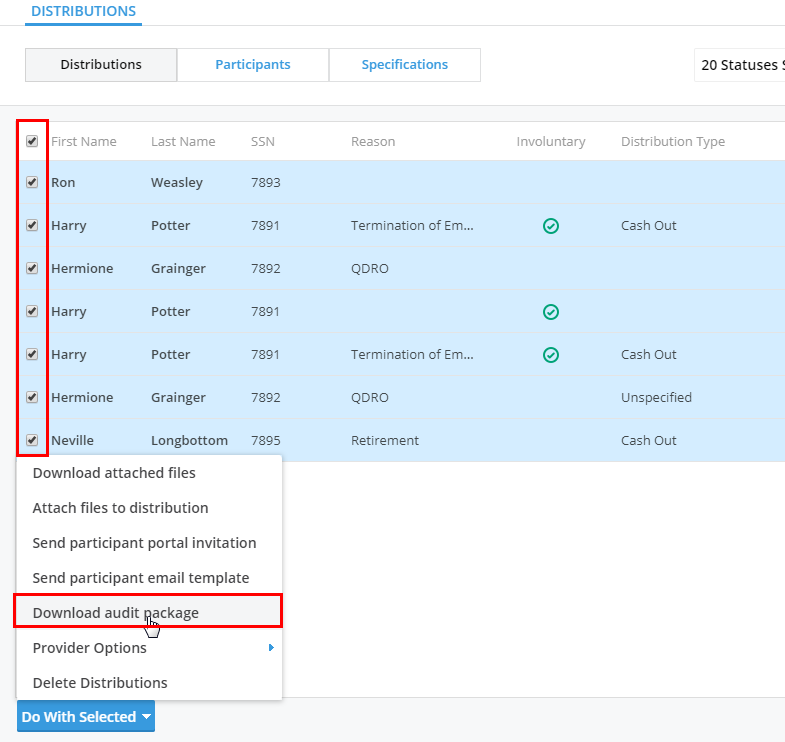
In addition to download the distribution ‘Activity Summary’ for a specific distribution, you may also do this for all of your distributions at one time via the ‘Dot With Selected’ tool. This option will appear whether you are on the plan level or the global dashboard. You will first need to select the distributions you wish to export. From there, click the ‘Do With Selected’ button and choose ‘Download audit package option from the menu. The software will generate a zip file that includes a separate zip for each of your distribution records. Within that file, you will find your ‘Activity Summary’ and the 1099 and 945 if you prepared them using our Form 1099 Software.
ftwilliam.com has integration with the following Rollover Providers:
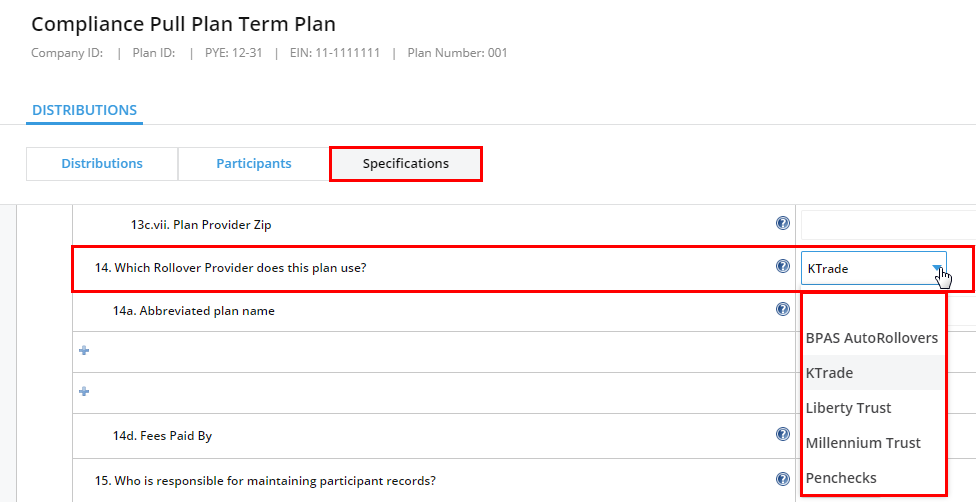
In the DTS specifications for your plan, you can indicate which Rollover Provider the plan uses. Once you’ve collected data for all of your distribution records, simply select the records you want to send by clicking on the checkboxes next to the distribution record on the plan menu.
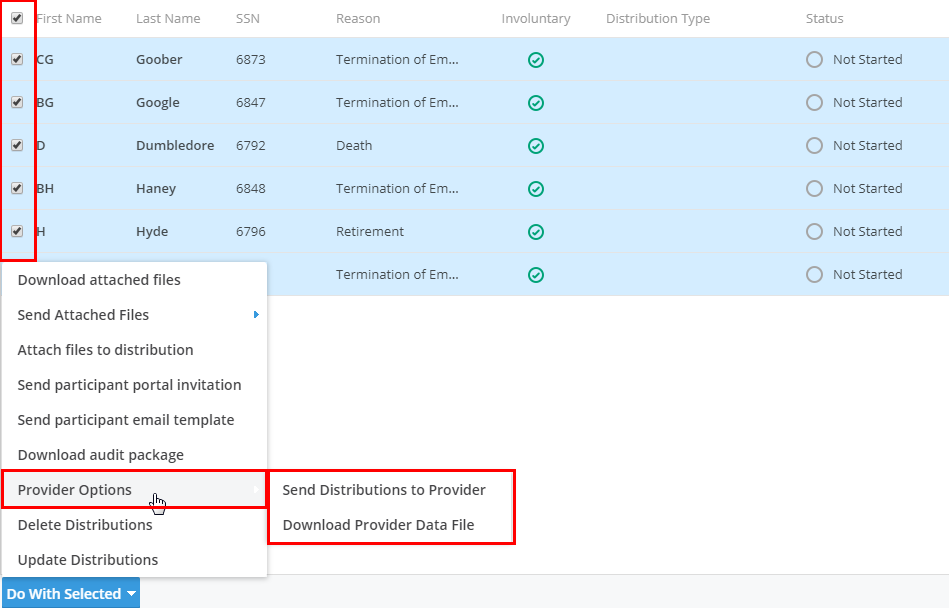
Once your records are selected, click on the “Do With Selected” option and choose “Provider Options” from the menu. From there, you have the option to automatically “Send Distributions to Provider” or “Download Provider Data File”. When you send the file for the provider, ftwilliam.com sends all the data necessary to set-up the rollover account on your behalf. You will not need to prepare a spreadsheet, log into the provider’s portal and upload the information separately.
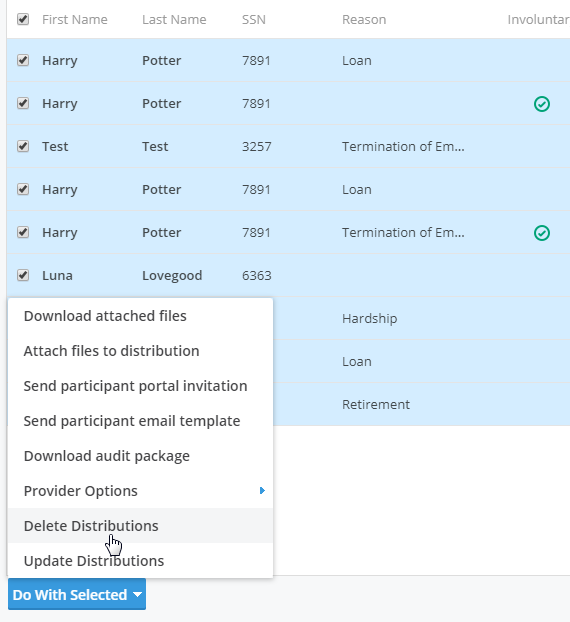
If you need to delete distribution records in batch, simply select the records that you want to delete on the dashboard and then use the “Delete Distributions” button in the “Do With Selected” tool to remove them. Please note, if your record was marked “Complete” or has a 1099 completed, you will not be able to delete the record.
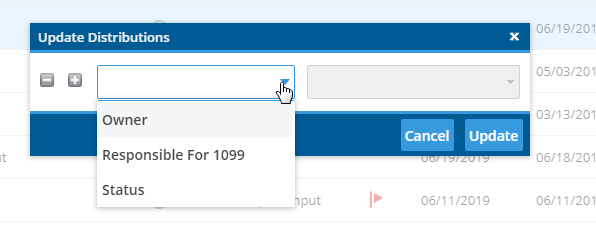
You may also update records in batch. Simply select the records you want to update and then choose which field you wish to change. Currently you will have the option to update the Owner of the record, the Responsible for 1099 status and the Status of your distribution.
The sorting, filters and export features are located on both the Global and Plan level dashboards. Each of the headers at the top of the grid can be used for sorting purposes. Simply click the header of your choice and the software will sort by alpha or numerical order depending on the header.
The filters can be used to narrow down the data in the grid based on your selections. For example, if you select a specific status from the drop down menu, the grid will only display distributions with that particular status. The software gives you the option to sort on a specific status, a date range, participant name, and distribution type.
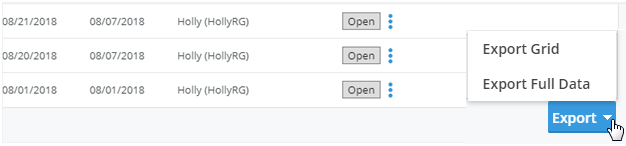
Once you’ve made your selections using the sorting and filters, you can also export the results using the “Export” button in the bottom right hand side of the grid on the global and plan level dashboards and then select “Export Grid”. If you want to export the full details for each selected distribution, choose “Export Full Data”.

If you will be preparing your Form 1099s in the ftwilliam.com software, you have the option to push all of the data that you collected in DTS directly into the Form 1099 Software. In order to do the push, please note the following:
If any of this data is missing, you will not be able to push your distribution record into the 1099 Forms. The software will also take into account if you need two 1099s for a distribution or if distributions should be combined onto one 1099. It will also predict the first distribution code for you.
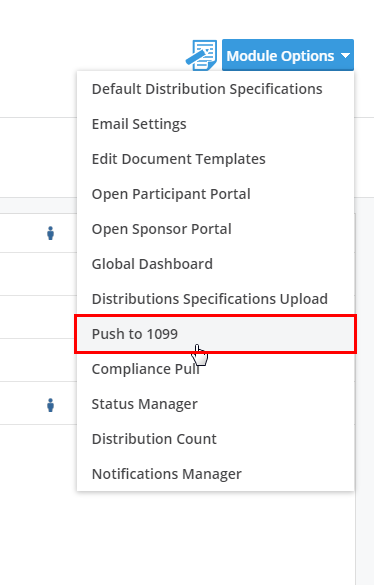
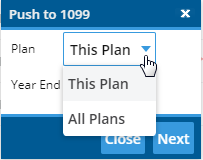
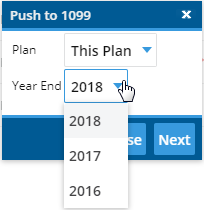
Once you are ready to push your data, locate the ‘Module Options’ button in the upper left corner of the dashboard. You have the option to push distribution records for all plans in your account or for the plan you are currently in. You will also need to choose the year end for your distribution records at this time. This will tell the software which 1099 forms to populate after the push. Once you’ve made your selections, click the ‘Next’ button to see the results of your selections.
You should now see a list of distribution records based on your selections. It’s important to review any errors prior to continuing on with the push. The software will indicate whether or not it can predict the 1099 code from the data provided or if you need to provide additional details in the distribution record.
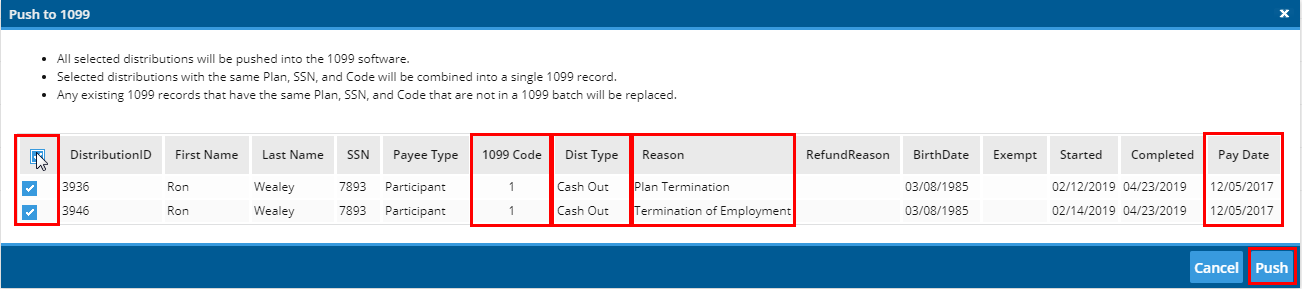
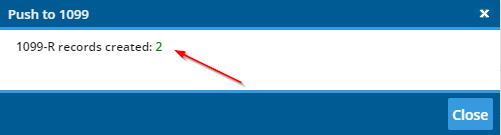
Once you’ve completed your review of the results, click the ‘Push’ button to proceed with the data transfer to the Form 1099 Software. The software will give you a confirmation screen indicating how many 1099 records were created.
When you arrive to the 1099 Software, you will find a list of participants. When you select a participant and view the distribution, you should see all of the data the software populated for you.
If you are an ftwilliam.com compliance user, you will benefit from the integration between DTS and Compliance. The software gives you the ability to pull data directly from the compliance software into DTS for Plan Terminations, Partial Plan Termination, Force-Outs and RMDs.
To access the tool, locate the ‘Module Options’ button on the PLAN dashboard and click “Compliance Pull” from the drop down menu. Once selected, a modal will appear with your options:
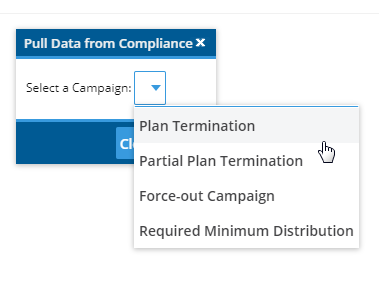
Note: Corrective distributions and refunds coming soon.
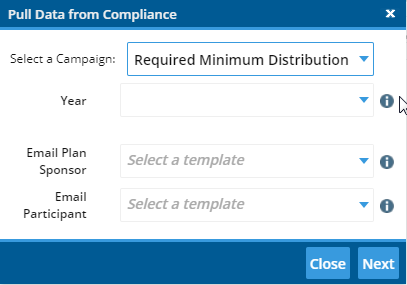
Now select your campaign from the drop down menu and add your filters. There will be different filters depending on the campaign you chose. If you choose the “Force-Out Campaign” the software will populate the maximum balance from the plan document checklist when you are a document software subscriber. For year-ends, the software will populate the most current year-end. If the year-end is incorrect, you may need to run your reports in compliance before proceeding.
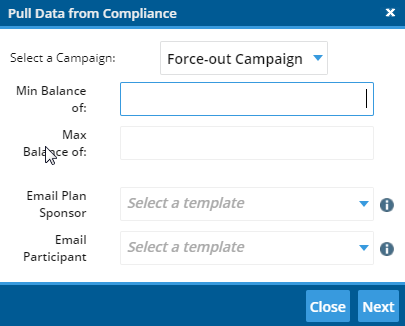
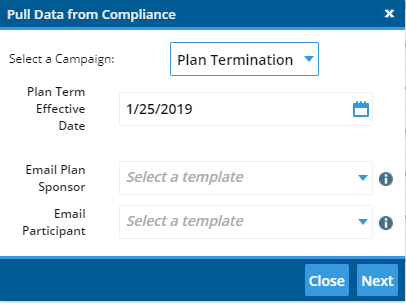
Once you’ve entered your filter information, you will have the option to choose an email template to send to the plan sponsor and participant once the distribution records are set-up. If you’ll be using the participant and plan sponsor portals, this will automatically send out invitations to the portal inviting each party to login and fill out distribution details. If you do not want to send invitations at the same time the records are set-up, you can skip this part and proceed to the “Next” button.
After clicking “Next” you should receive your results of the pull in a grid. Each campaign will pull the appropriate data from compliance for you to review before proceeding with distribution record set-up. Simply select your records you want to proceed with by checking the boxes on the left and then click “Pull”. You can also export the results by clicking the link called “Export Grid Results”.
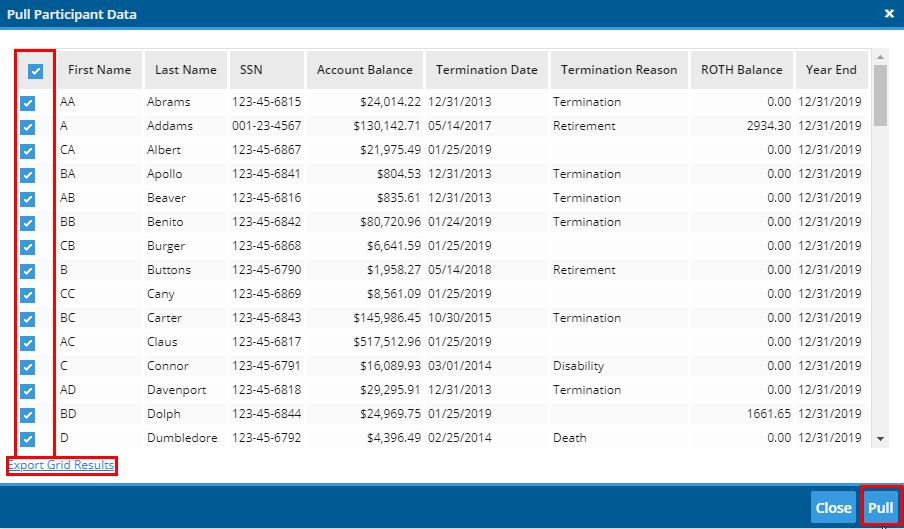
After clicking “Pull” you should see a distribution on your dashboard for each of the participants you selected from the results. The software will populate the contact information for your participants, the “Date of Hire”, “Date of Termination” when appropriate, “Approximate Vested Account Balance”, “Outstanding Loan Balance”, and “Roth Balance”. When the RMD campaign is used, the software will populate the RMD amount for you.